

Add extra cheer to your holiday dessert trays with these darling dipped Oreo cookies. Festive red and white candy melts coat chocolate sandwich cookies, decorated with a simple Christmas tree icing and candy design. Easy to make with the whole family and fun to eat.

This post contains affiliate links. As an Amazon Associate, I earn a commission (at no additional cost to you) from qualifying purchases made by clicking these links. As always, all recommendations and opinions expressed are my own.
What You’ll Need to Make Dipped Oreo Christmas Tree Cookies
- Chocolate Sandwich Cookies (such as Oreos). Use any of your favorite flavors here. We most often use classic Oreo cookies, but other varieties, such as Double Stuf, Mint, Chocolate Creme, or Chocolate Hazelnut would be fun too.
- Red and White Candy Melts. These are made specifically for melting and dipping, so they’ll set to a solid coating. I’ve found them in the baking aisle at the regular grocery store and at craft stores. They’re also available for order on Amazon: Wilton Red Candy Melts; Wilton White Candy Melts.
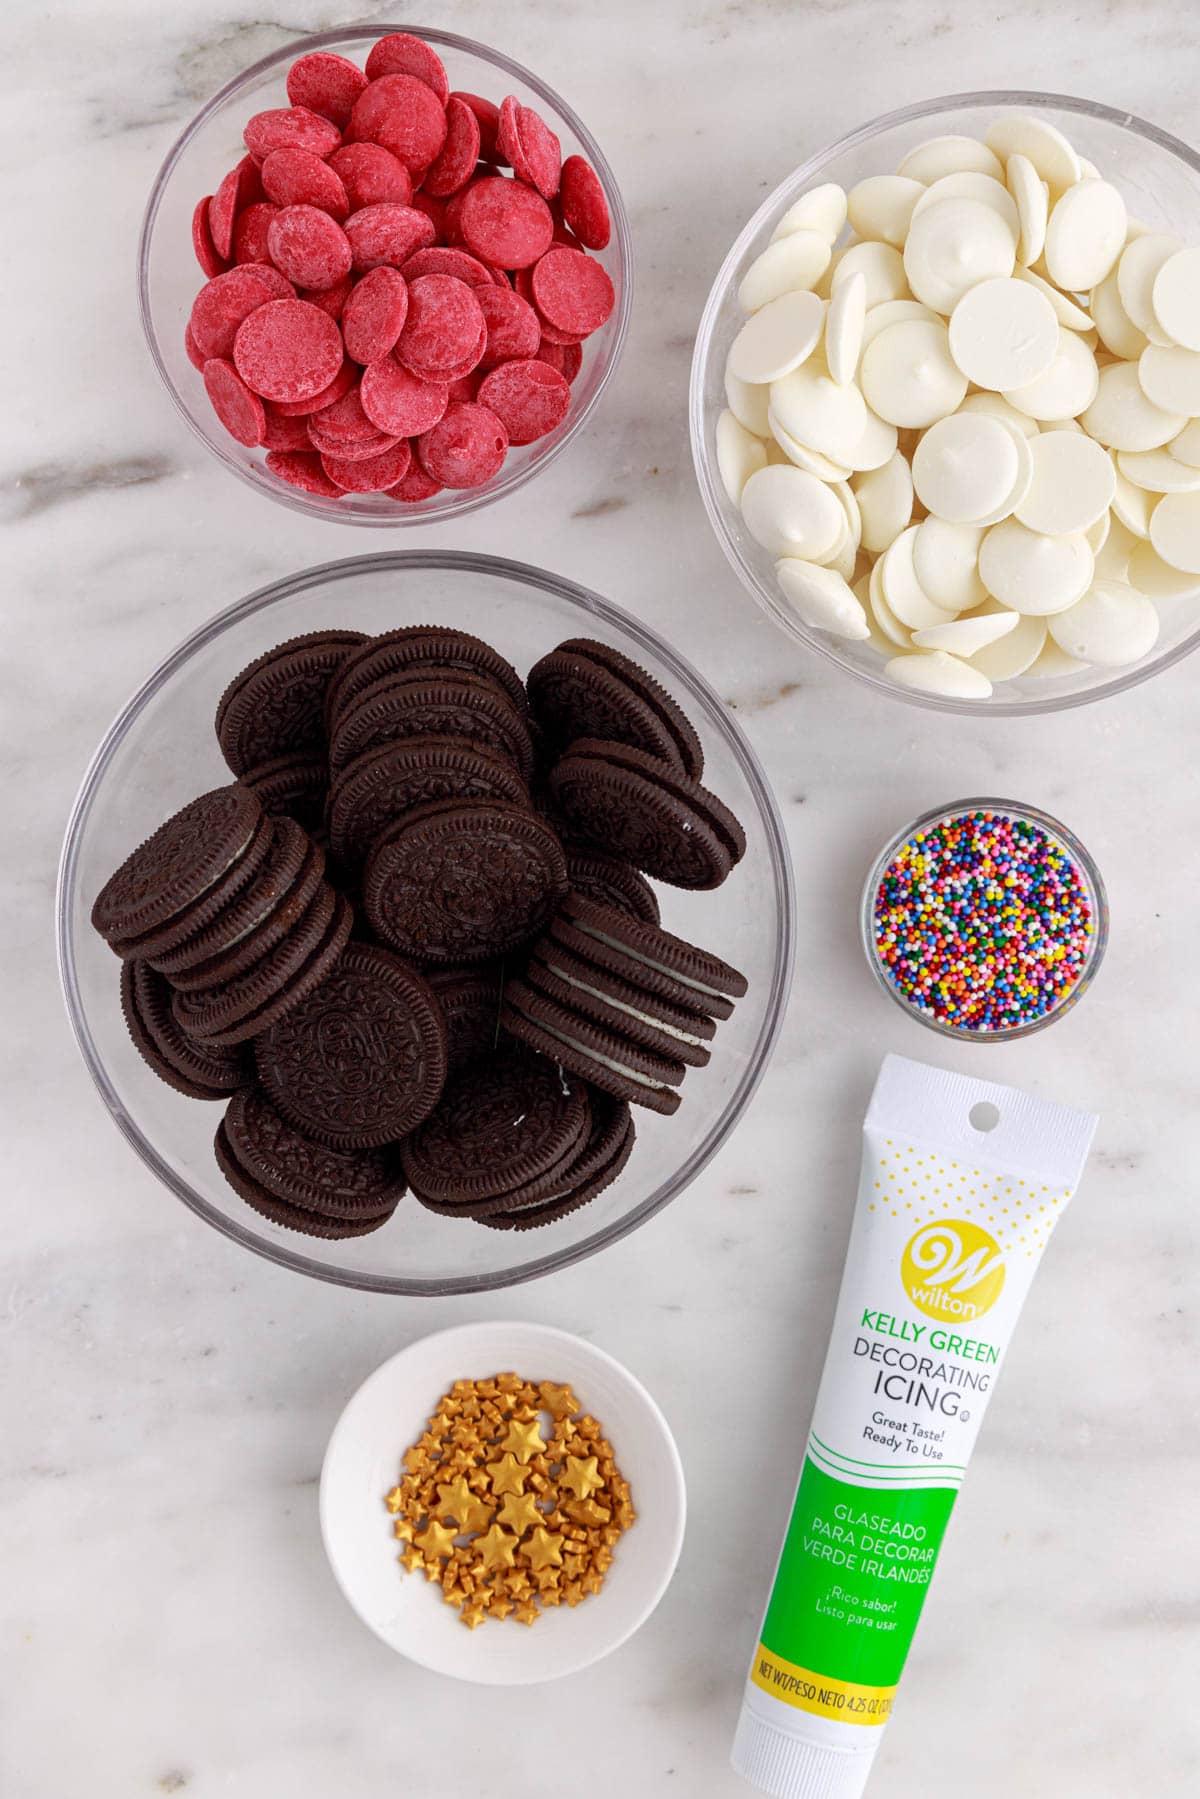
- Green Decorating Icing. For piping the trees onto the dipped cookies. The Wilton brand allows you to attach any standard sized piping tip onto the tube, making it versatile for cookie decorating. I recommend against using the “gel writers”, as they are too runny and prone to smearing. Like the candy melts, decorating icing tubes are often sold in the baking aisle at the grocery store, in craft stores, and on Amazon: Wilton Kelly Green Decorating Icing.
Prefer to make your own icing? Use your favorite crusting frosting recipe, such as my American Buttercream, dyed green with gel food coloring, or Piping Royal Icing.
- Multicolored nonpareil sprinkles and gold star sprinkles. For decorating the piped trees with “lights” and a “tree topper”. Nonpareils are regularly stocked in the baking section of grocery stores, at craft stores, and on Amazon: Wilton Rainbow Nonpareils. You’re most likely to find the star sprinkles at the craft store, specialty sprinkle or baking shops, and on Amazon: Sugar Deco Shiny Metallic Sequin Confetti Sprinkles. If you’re able to source two sizes of star sprinkles, it’s fun to vary them across the batch.*
*Note: I do recommend that you check the recommended age for the stars and any decorative sprinkles/candies you buy for these cookies, to ensure that they don’t present a choking hazard for small children before decorating or serving.
How to Make Dipped Oreo Cookies
The process for making these cookies couldn’t be simpler–just dip and decorate!
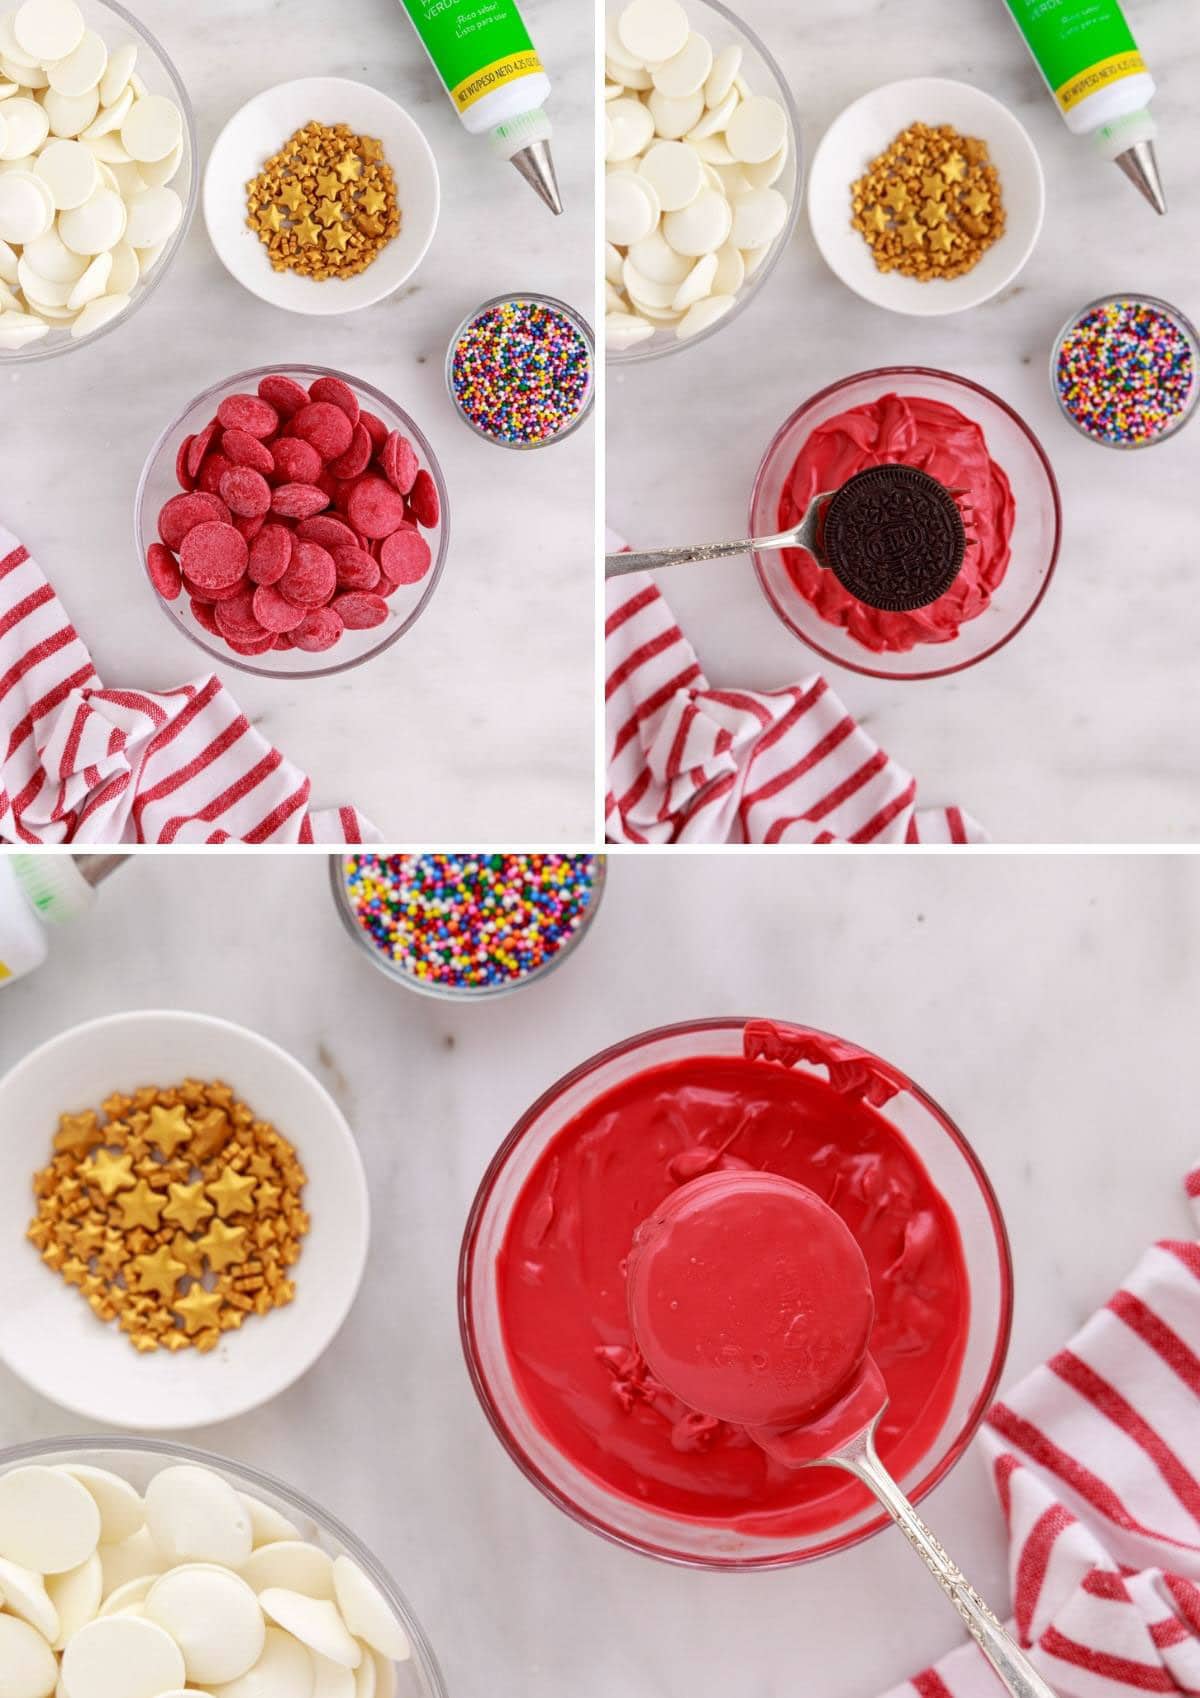
Dipping the Oreos
Start by melting the red and white candy melts in separate bowls, according to package directions. You can either use the microwave for this process in 30-second increments at half power, or a double boiler on the stove.
When working with the candy melts, be careful not to overheat them or get any water into the bowls. Both will cause the candy to seize up, making it unusable for dipping.
Did the candy melts seize or does the melted coating seem too thick to coat the cookies smoothly? Wilton makes a product called EZ Thin Dipping Aid that will help the candy melts regain a dippable texture. You can also stir solid vegetable shortening into the melted wafers. Wilton recommends a ratio of 2 tablespoons shortening to a 12 ounce bag of candy melts.
Once the candy is melted, gently insert a fork or toothpick between the two cookie layers. Dip the cookie into the bowl, coating it on all sides. Lift the cookie out of the bowl, let the excess coating drip off, and place the cookie on a parchment-lined baking sheet to set.
While you’re dipping the full batch, the candy melts will naturally cool in the bowls and start to thicken, making it more difficult to attain a smooth coating. You can rewarm the melted candy in 15-second increments at half power in the microwave, as needed.
Continue the process, alternating between the red and white coatings, until you’ve dipped all of your cookies. Let the coating harden before decorating. I like to pop the sheet pans into the refrigerator for 10-20 minutes, until the coating is firm.

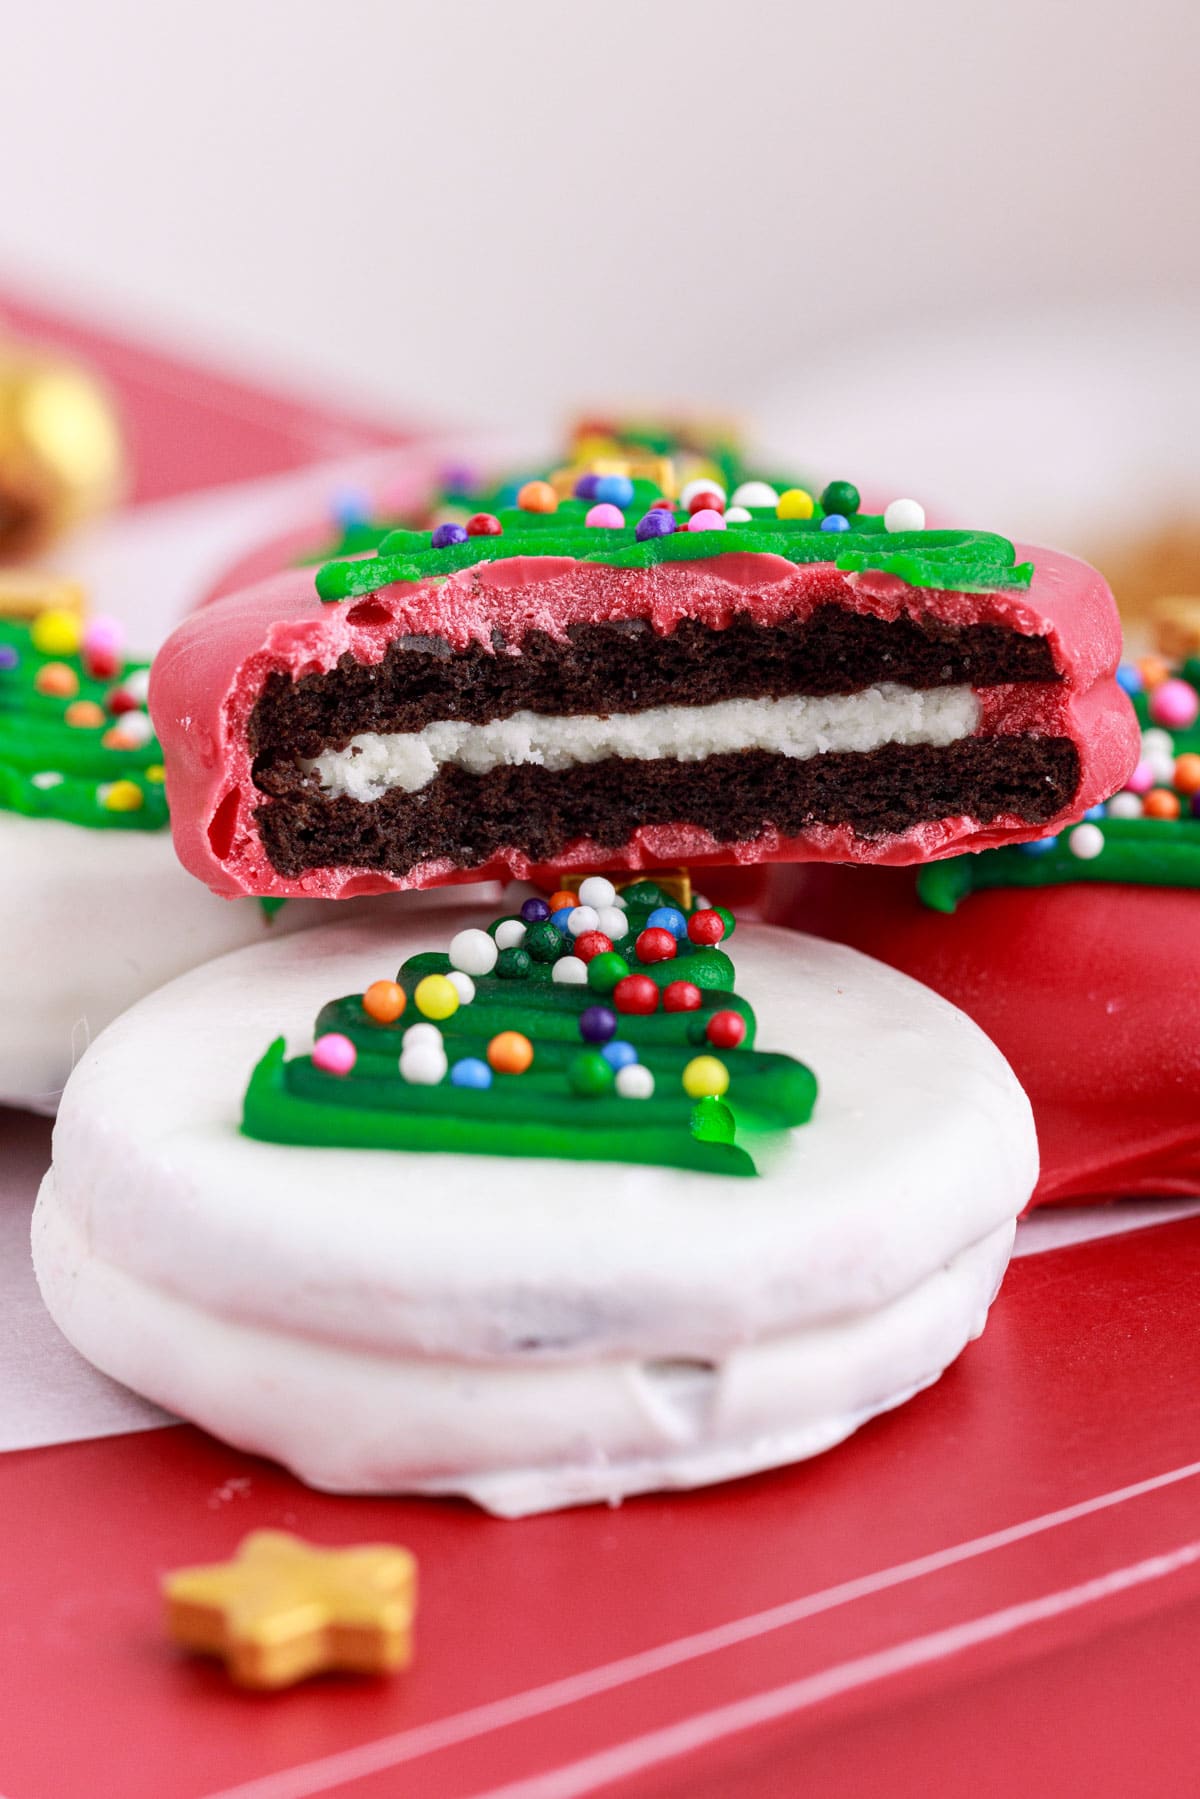
Decorating the Dipped Oreo Cookies with Christmas Trees
Once the cookie coating has set, it’s time to have fun decorating! To make the trees, use a small round piping tip with the green decorating icing to draw a “squiggle” in the center of each cookie, as pictured. Start at the top with a small back and forth motion, widening with each pass down to the base of the tree.
Sprinkle the nonpareils over the icing add “lights”, and top each tree with a star. It’s that easy!

Frequently Asked Cookie Questions
Q. Can I use chocolate to dip the cookies instead of candy melts?
A. Yes, but you’ll need to temper the chocolate first. For instructions, check out How to Temper Chocolate from Epicurious. Alternately, I recommend Ghirardelli’s chocolate melting wafers, which, like the candy melts, are created for dipping. They come in milk chocolate, dark chocolate, and white chocolate varieties.
Q. How do I store these dipped Oreo cookies and how long will they last?
A. The cookies will stay fresh in an airtight container at room temperature for 1-2 weeks. For best presentation, store the cookies in a single layer, not stacked. While the green decorating icing will crust, it will not fully harden.
Q. Can kids help make these cookies?
A. Absolutely! This recipe is a great one for the whole family to gather and assemble. I’d recommend adults, teens, and tweens handle the dipping of the cookies into the candy melts. School aged children might enjoy drawing the icing trees, with assistance, if needed, and decorating the cookies with sprinkles. As always, use your good judgment for the children amongst your friends and family.
More Cookies for the Holiday Season
- Peanut Butter Blossoms
- White Chocolate Chai Shortbread Cookies
- Chocolate Peanut Butter Chip Cookies
- Chocolate Hazelnut Thumbprint Cookies with Raspberries
CRAVING MORE? Subscribe to my newsletter and join me on Facebook, Pinterest, and Instagram for the latest recipes and news.

Dipped Oreo Christmas Tree Cookies
Ingredients
- 12 ounces red candy melts
- 12 ounces white candy melts
- 24 Oreo cookies
- 1 tube green decorating icing , 4.25 ounces (not "gel" writers)
- ¼ cup rainbow nonpareil sprinkles
- 24 gold star sprinkles *
Instructions
- Place the candy melts in separate bowls and heat, according to package instructions for the microwave or double boiler. Be careful not to overheat or get water into the bowls.
- Gently insert a toothpick or fork between the two cookie layers. Dip the cookie into the melted candy, coating all sides. Tap off the excess coating and place cookie on parchment-lined baking sheet. Repeat to make 12 red and 12 white dipped cookies.
- Let the cookies sit until the coating is fully hardened. I like to pop them into the refrigerator for 10-20 minutes to help the coating set.
- Use a small round piping tip with the tube of green icing to draw a squiggle in the center of the cookie to make a “tree.” Start with a small back and forth motion for the top of the tree, moving in larger swirls down to the tree's base.
- Sprinkle nonpareils over the freshly piped icing and place a star candy at the top.
- Store cookies in a single layer in airtight containers at room temperature for 1-2 weeks.
Notes
Nutrition Estimate
Nutrition information is automatically calculated, so should only be used as an approximation.
Please note that our recipes have been developed using the US Customary measurement system and have not been tested for high altitude/elevation cooking and baking.


