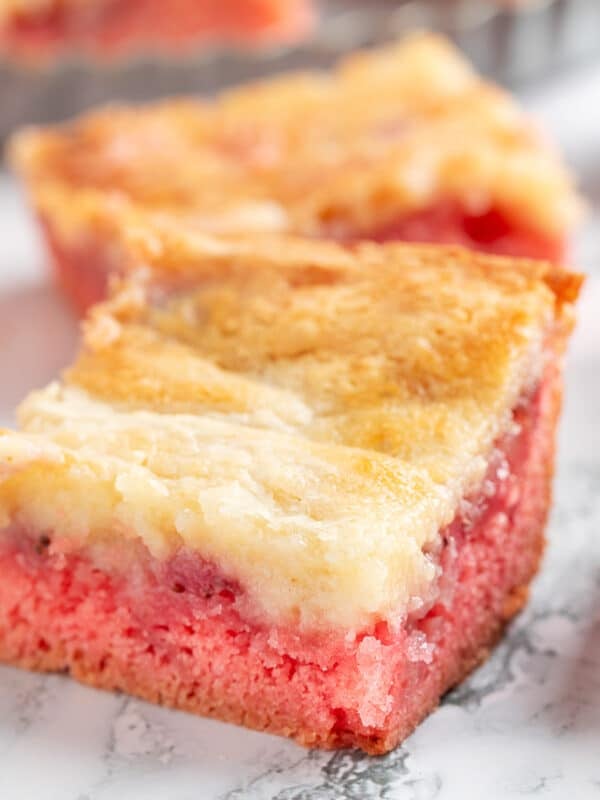
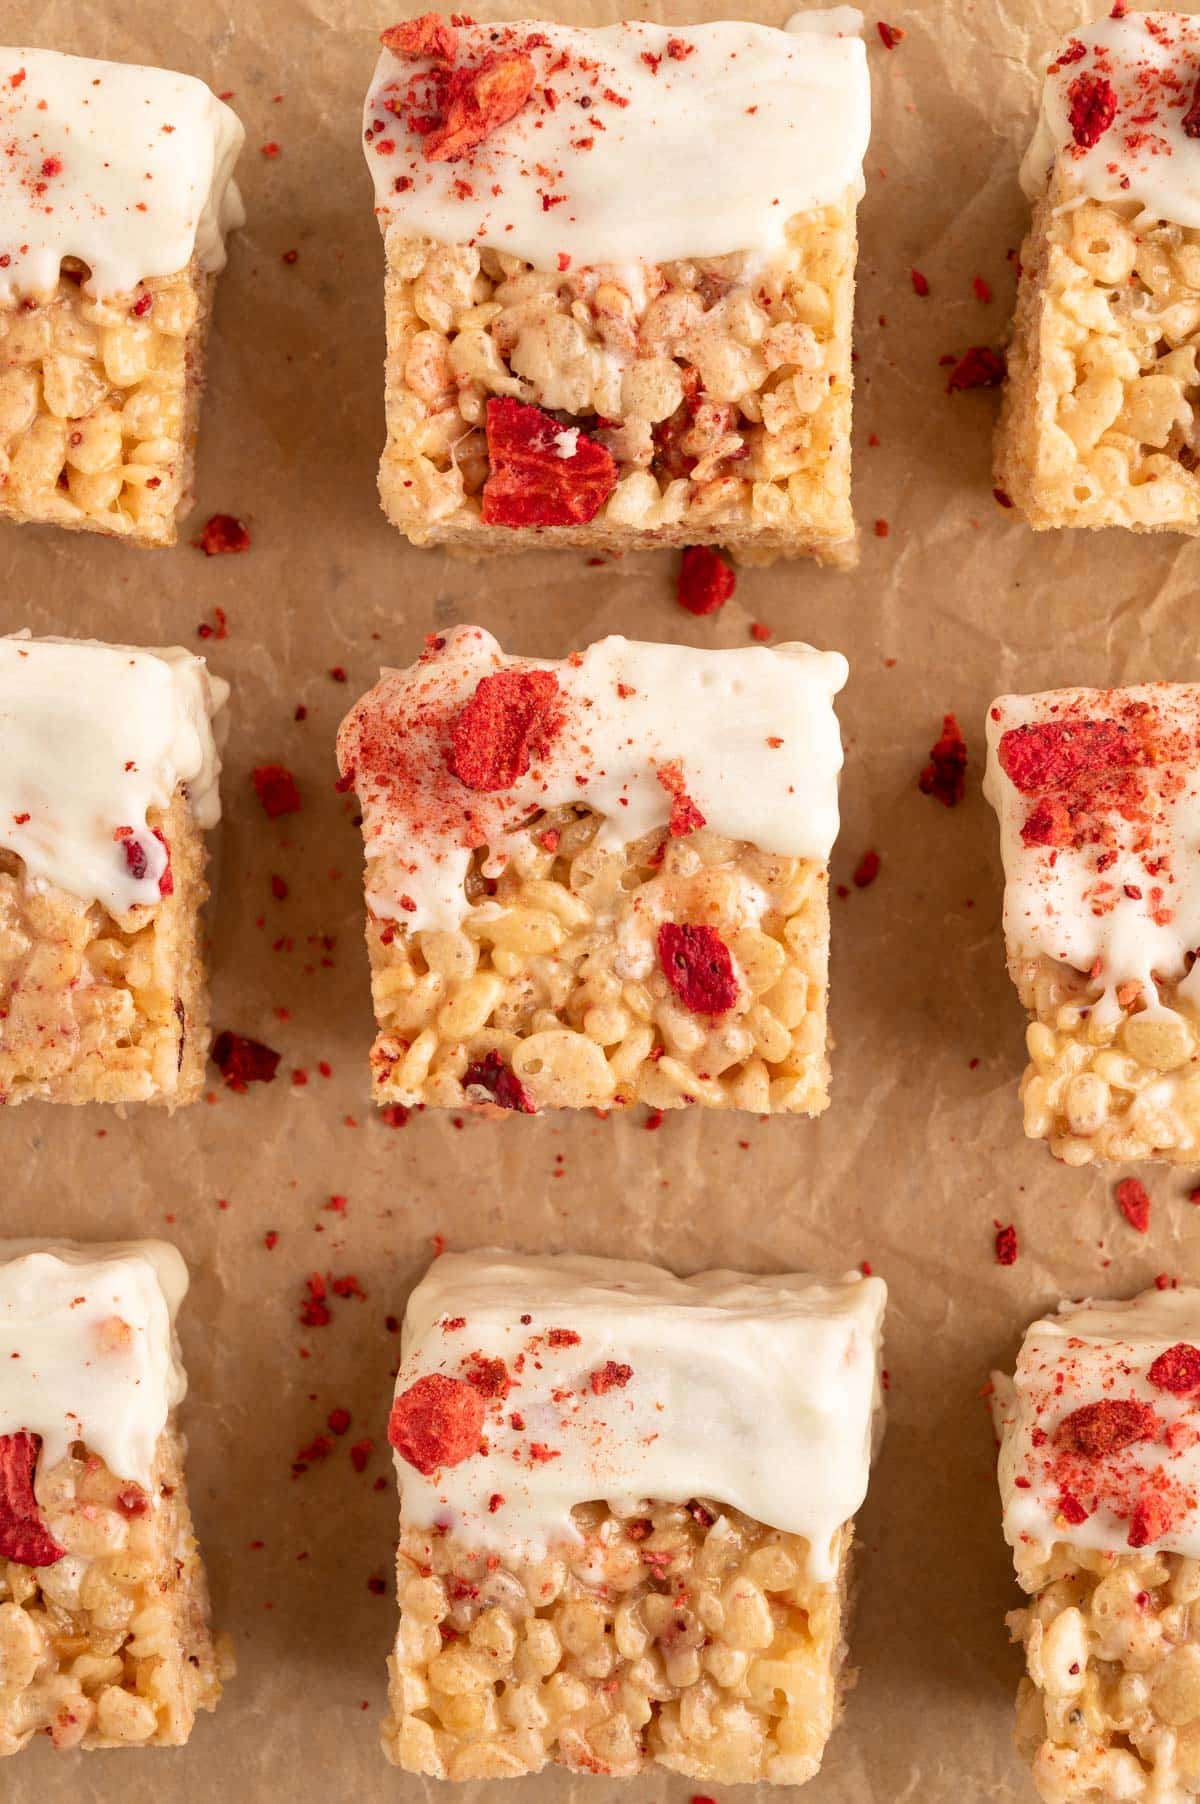
These Strawberry Rice Krispie Treats are the perfect combination of buttery marshmallows, sweet-tart strawberries, and rich chocolate. This recipe yields the crunch you expect from classic Krispies treats, with a fruity flavor twist. Make these for Valentine’s Day or anytime you’re craving something sweet and special.
This post contains affiliate links. As an Amazon Associate, I earn a commission (at no additional cost to you) from qualifying purchases made by clicking these links. As always, all recommendations and opinions expressed are my own.
Why You’ll Love these Strawberry Rice Krispy Treats
Like many of us, sweet, gooey Rice Krispies Treats were a staple of my childhood. Suffice it to say that on some of the best days at elementary school, I’d open my lunch box to find a lovingly-wrapped treat alongside my sandwich and juice box. As an adult, they’re pure nostalgia.
These Strawberry Rice Krispie Treats are a fruit-infused twist on the classic that are sure to be a hit with adults and kids alike. Here’s what we love most about this recipe:
- Just like classic Krispie Treats, this no-bake recipe is easy to make, without a lot of prep time.
- They’re fun and the whole family can help decorate the treats.
- The strawberry flavor in this recipe is all natural with no artificial sugars, flavors, or dyes.
- They’re pretty and festive, making them great for celebrating Valentine’s Day, as well as spring and summer holidays.
Love food history? Learn about one of the women credited with creating the original Rice Krispies Treats recipe in the 1930’s. Check out, “Love Rice Krispies Treats? You Have an Iowan to Thank” from the Des Moines Register.
Ingredients You’ll Need
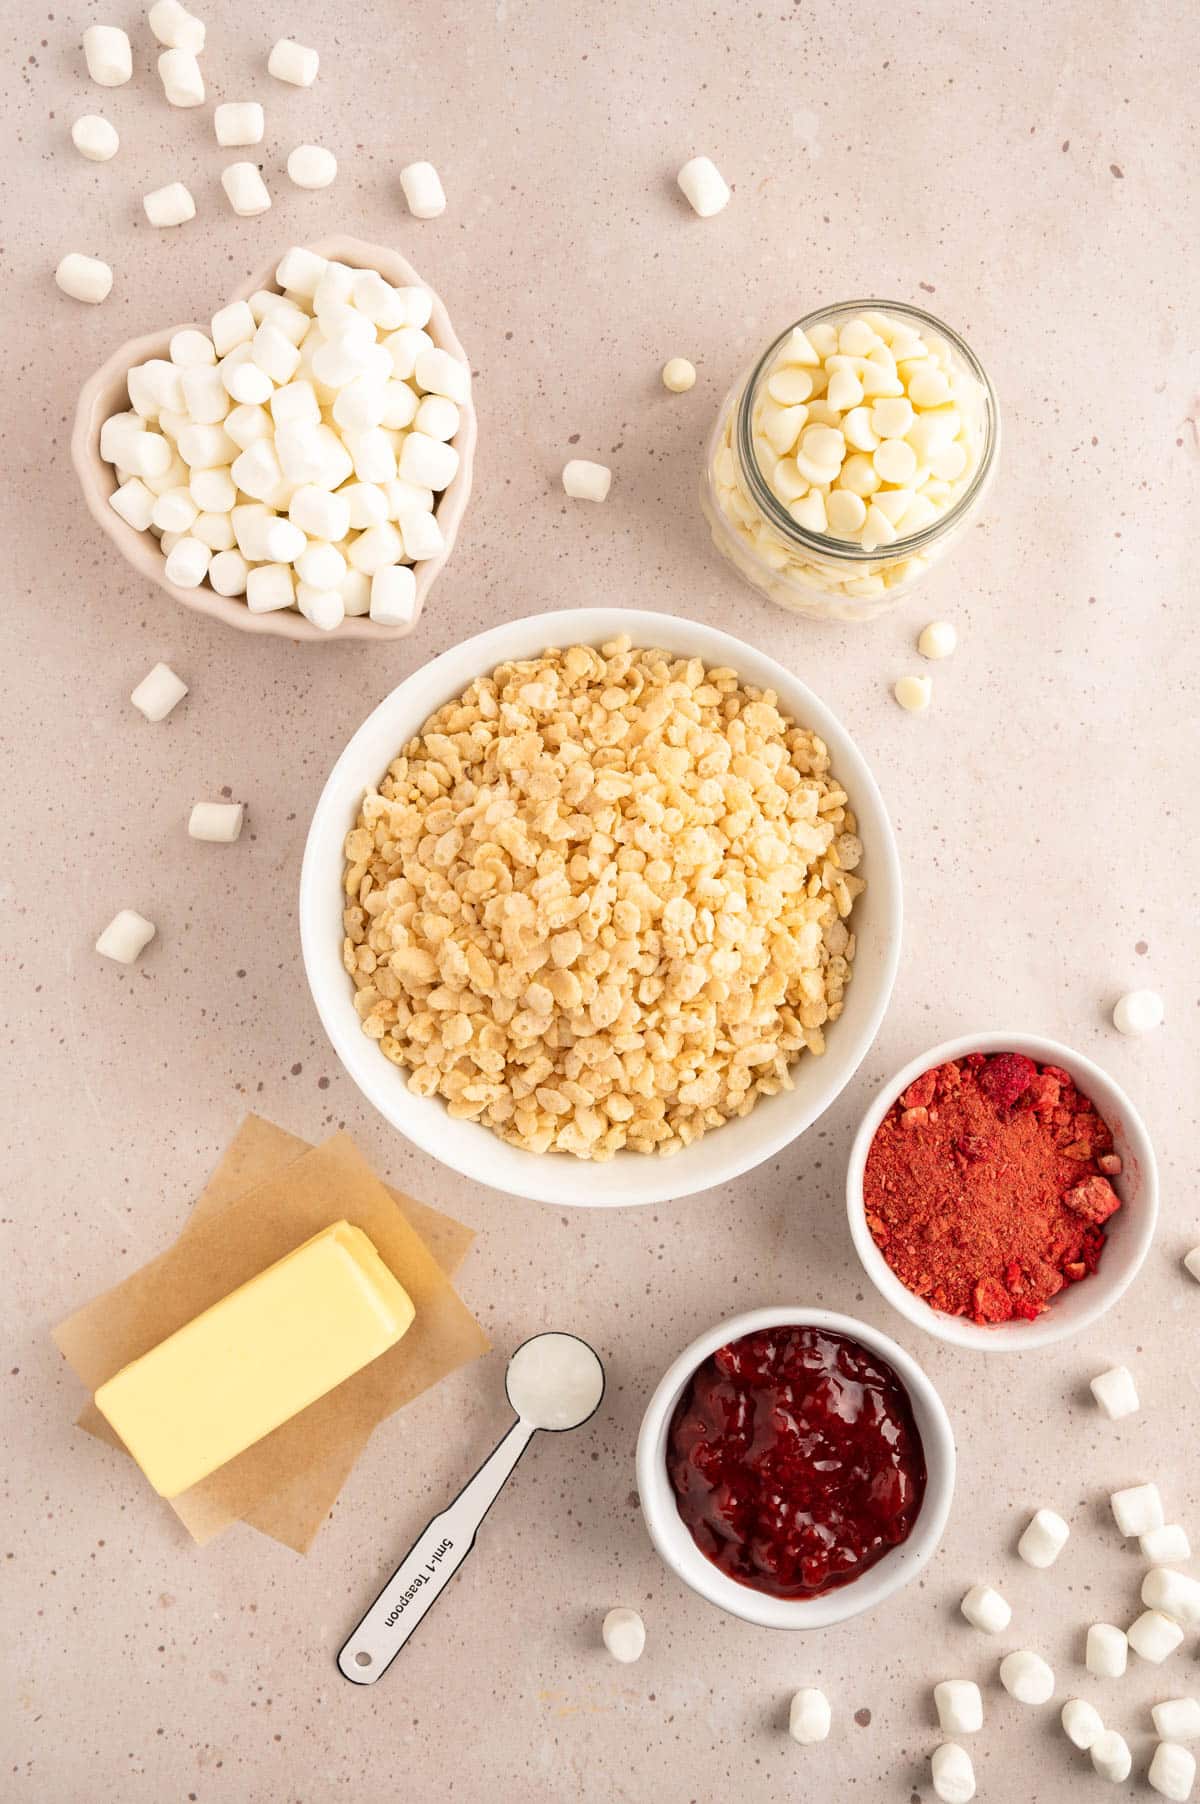
- Butter. I love using a rich and creamy European-style butter (such as Plugra or Kerrygold) since the butter flavor comes through so prominently in these types of treats. Using salted butter balances the sweetness in the recipe.
- Marshmallows. Use melted mini marshmallows to make the sticky base, and whole mini marshmallows later in the recipe to give these treats little gooey pockets of deliciousness when they’re set. It’s important that the marshmallows are fresh.
- Strawberry Preserves. Select high-quality preserves with a plentiful amount of fruit. (I love using Bonne Maman Strawberry Preserves in this recipe.) Do not use jelly. Jam is okay, but preserves are best because they contain larger pieces of fruit.
- Crushed Freeze-Dried Strawberries. Add color and real strawberry flavor to the treats themselves, and a pretty garnish on top of the chocolate coating. You can usually find freeze-dried strawberries in the “Natural” section of the grocery store, in the produce department, or on Amazon.
- Puffed Rice Cereal. Brand name (Rice Krispies) or generic cereal will work for this recipe. Be sure to buy plain (“Original”) crispy rice or puffed rice cereal, not favored varieties (such as Cocoa or Frosted Krispies). Just like the marshmallows, the cereal needs to be fresh for the best treats.
- Chocolate Chips. Use your favorite type of white or dark chocolate chips for dipping or drizzling. (I keep Guittard Choc-Au-Lait White Chocolate Baking Chips and Ghirardelli Semi-Sweet Chocolate Chips in my pantry.) You can also use melting chocolate, such as Ghirardelli’s White Vanilla Flavored Melting Wafers or Dark Chocolate Flavored Melting Wafers. Note that “melting” varieties of chocolate will not need the addition of coconut oil.
- Coconut Oil. Added to thin the chocolate in order to achieve the correct consistency for dipping and setting. Depending on the brand of white chocolate you’re using, you may need more or less than the recommended teaspoonful.
Choosing a Pan to Make The Treats
I find an 8-inch square baking to be ideal for this recipe, yielding 16 thick, dense squares. Stoneware, metal, and glass pans work equally well.
If you want to make treats that are not quite as thick, you can use a 9×9 or 13×9 pan. I especially like using a 13×9 pan when I’m using cookie cutters to cut the treats into shapes, like hearts, for Valentine’s Day.
Shopping for a new 8×8 baking dish? A few of favorites in my kitchen are the Emile Henry Modern Classics Square Baker (ceramic), Pyrex Basics Square Glass Baking Dish, and Williams-Sonoma Gold Touch Square Cake Pan (metal).
How to Make Strawberry Rice Krispie Treats
1. Prep the Pan and Freeze-Dried Strawberries
To start, prep the baking pan by lining it with parchment paper for easy removal and cleanup. Depending on the dish I’m using, I often leave a 2-inch overhang on two sides to make it easy to lift out the treats once they’ve set.
You’ll also need to crush the freeze dried strawberries (which are usually sold in slices) into a fine powder. If left whole they can become quite chewy and distract from the crunchy texture of the finished treats.
I like to put the strawberries in a zip top bag and crush them with a rolling pin. You can also pulse them to a powder in a food processor.
2. Make the Sticky Marshmallow Base
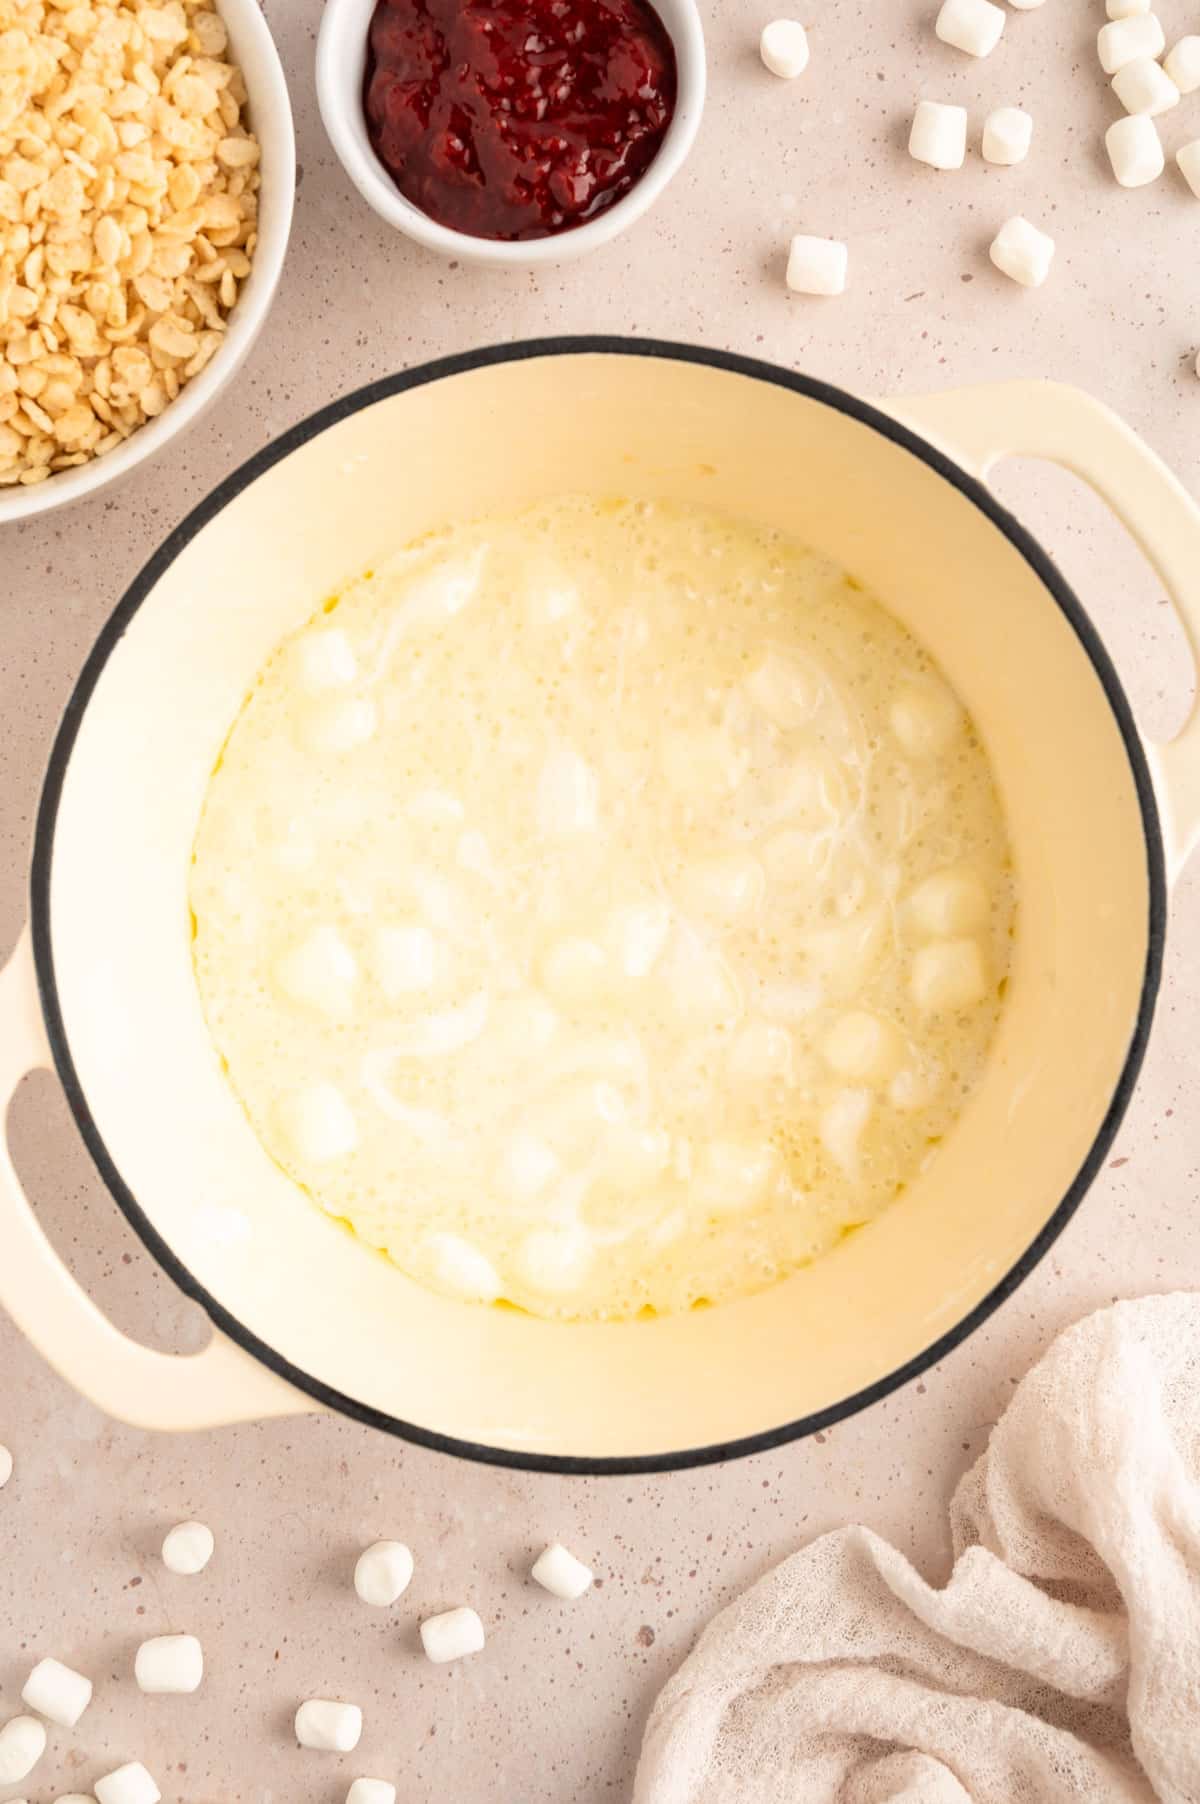
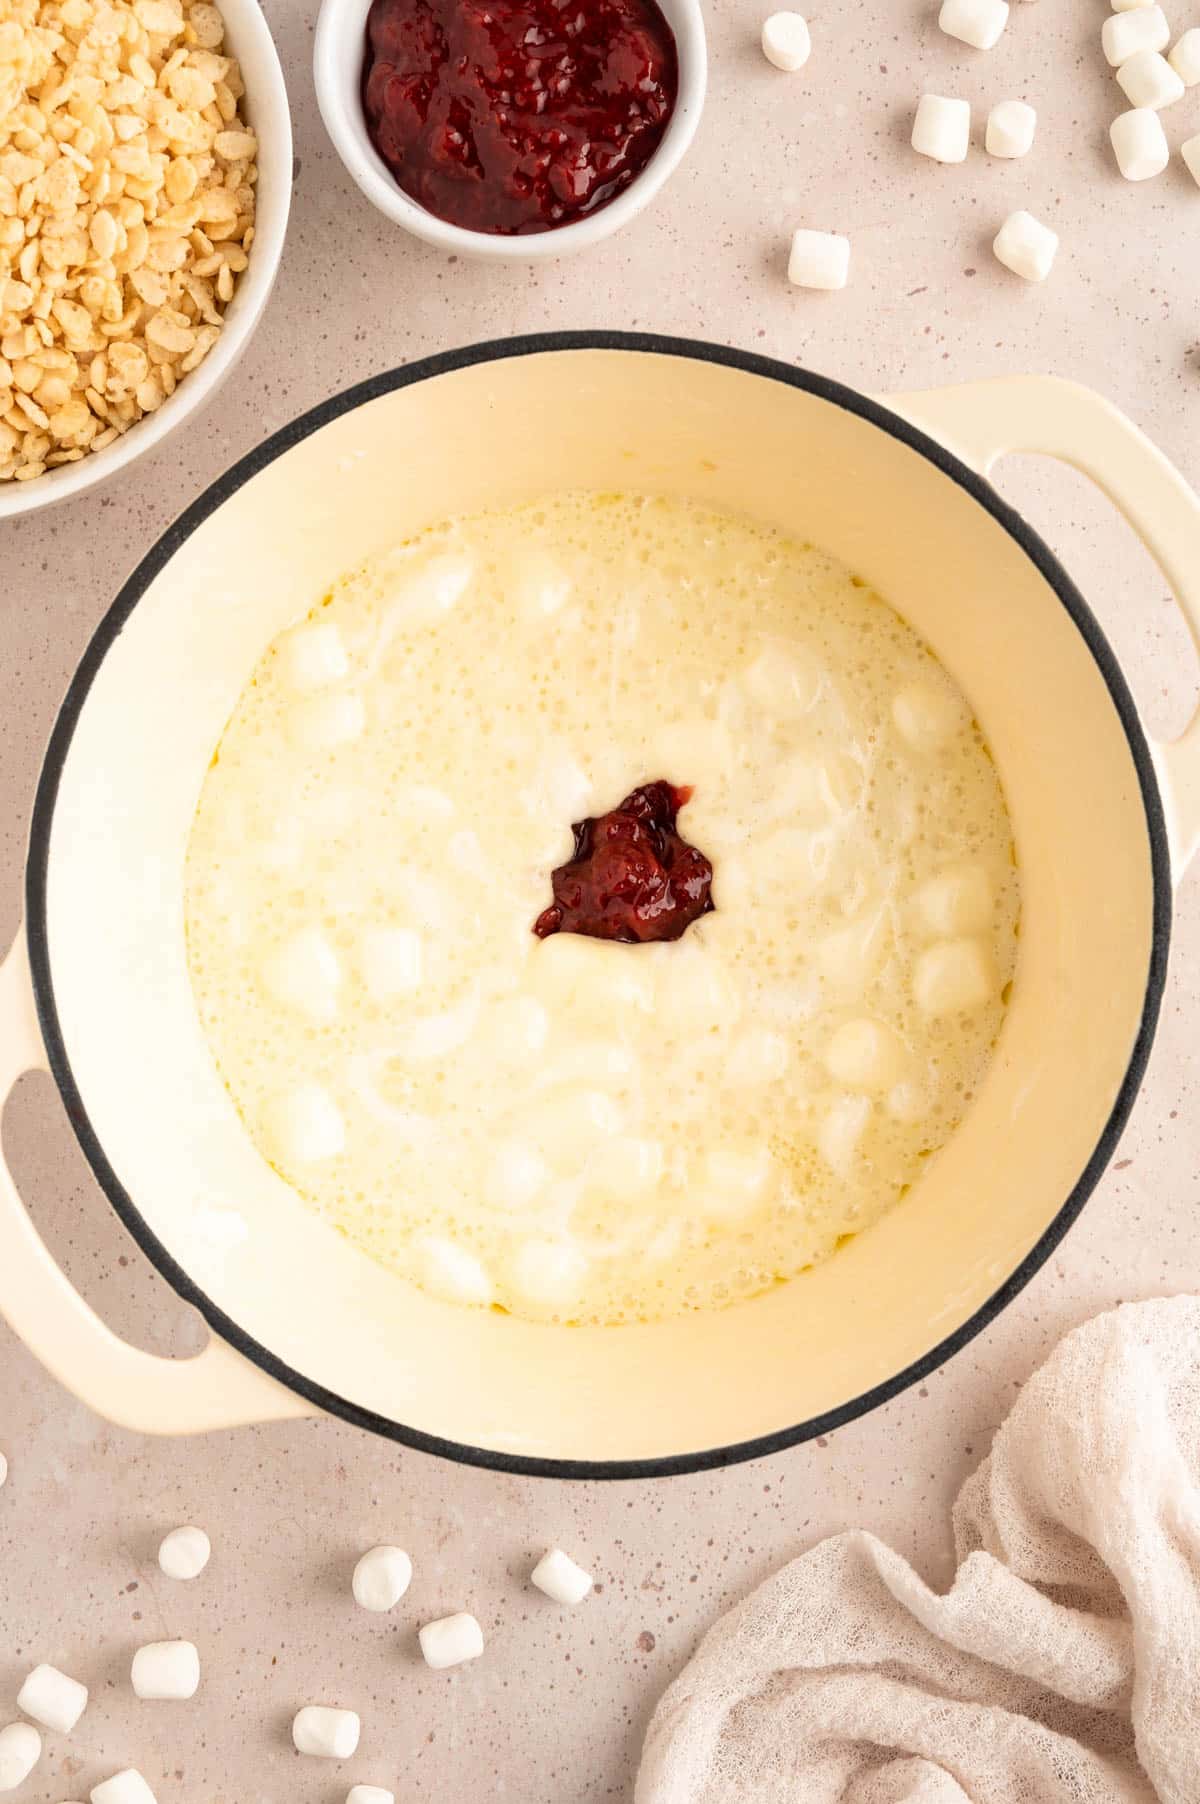
To make the base, start by melting the butter in a large, heavy-bottomed pot over medium-low heat. (I like to use one of my enameled cast iron Dutch ovens.) When the butter is fully melted, add a 10 ounce bag of mini marshmallows, plus an additional 1 cup, to the pot.
Tip: Save the butter wrapper to help with pressing and smoothing the sticky treats into the baking dish later in the recipe!
Cook over low heat, stirring constantly, until the marshmallows are puffed and almost melted. Add the strawberry preserves and vanilla extract to the mixture, and continue stirring over low heat for just a minute or two more, until smooth and combined.
It’s important to keep the heat on low in this step. For treats that are crispy, yet pliable, you don’t want to overheat the sugars in the marshmallows and preserves. Overcooking will result in a treat that’s too firm and candy-like when cooled.
3. Add the Cereal, Strawberries, and Extra ‘Mallows
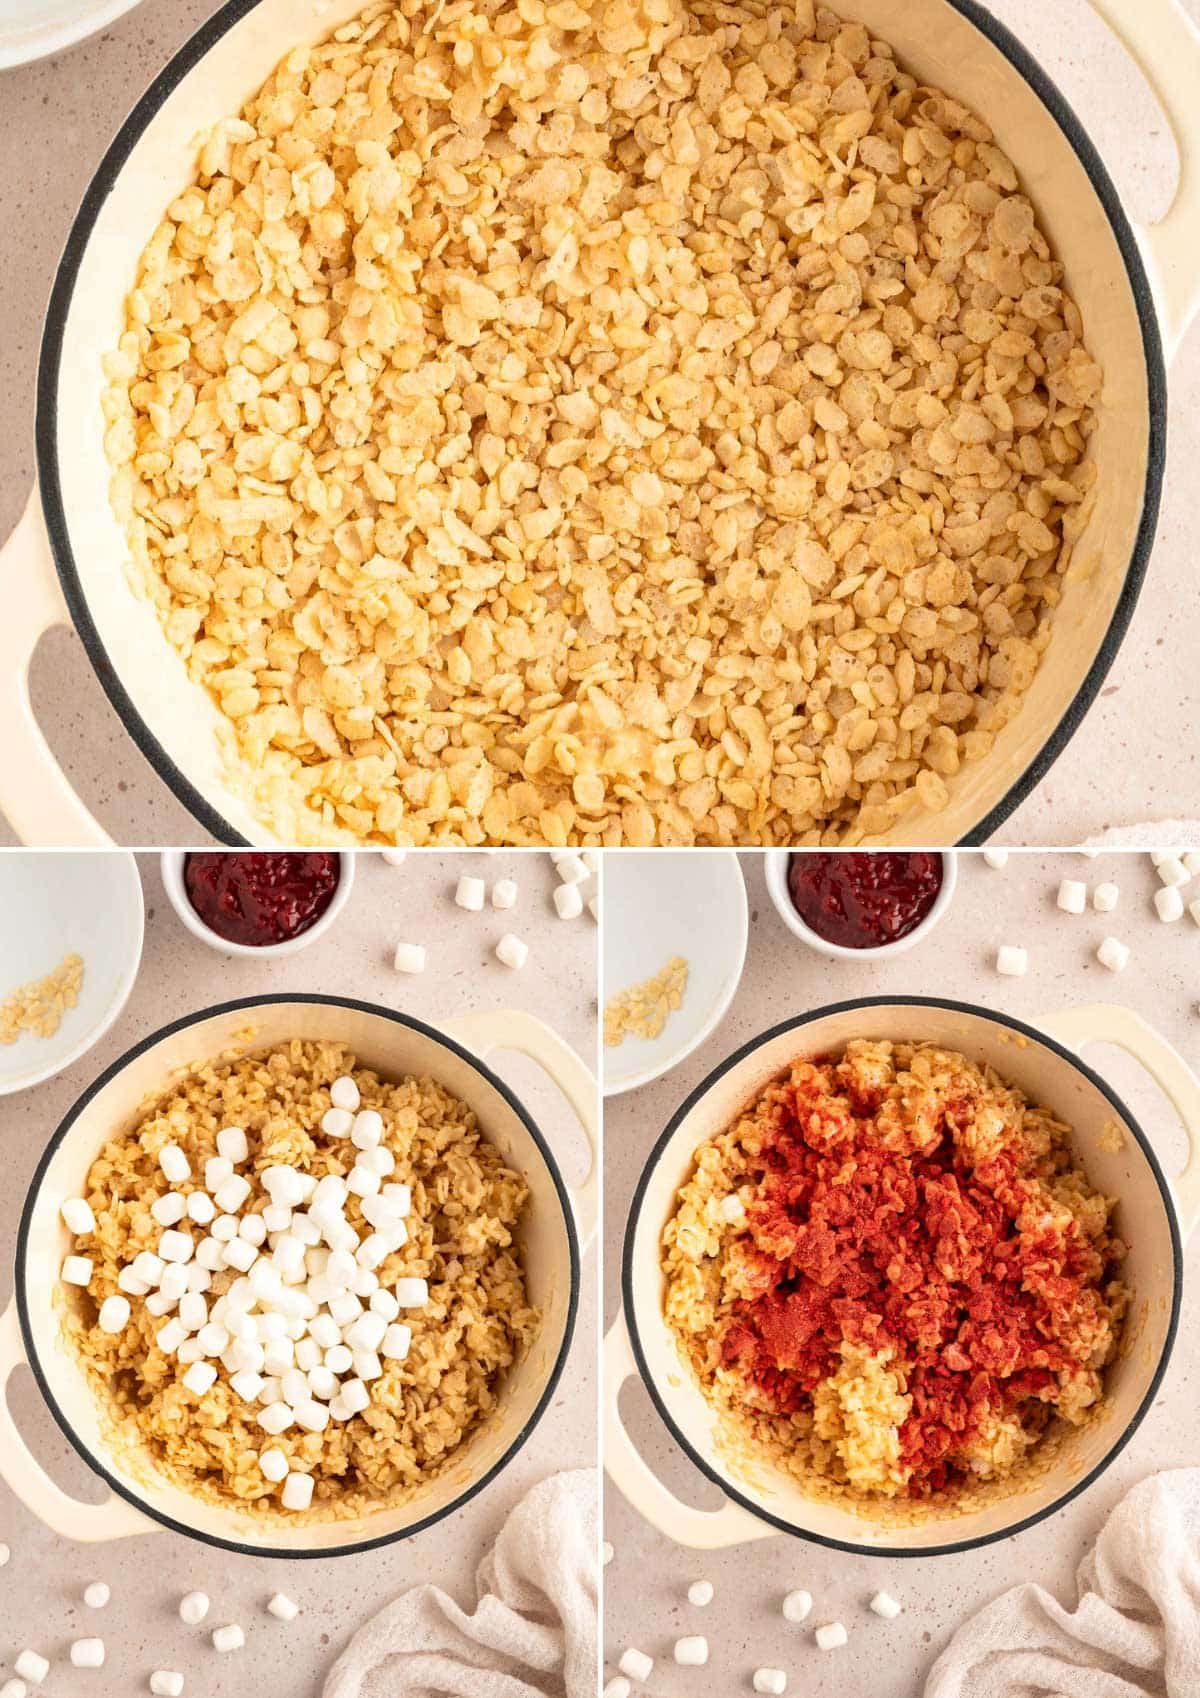
Remove the pot from the heat and immediately stir in the cereal until just combined. Add the crushed freeze-dried strawberries and remaining 1 cup of miniature marshmallows, stirring until evenly distributed.
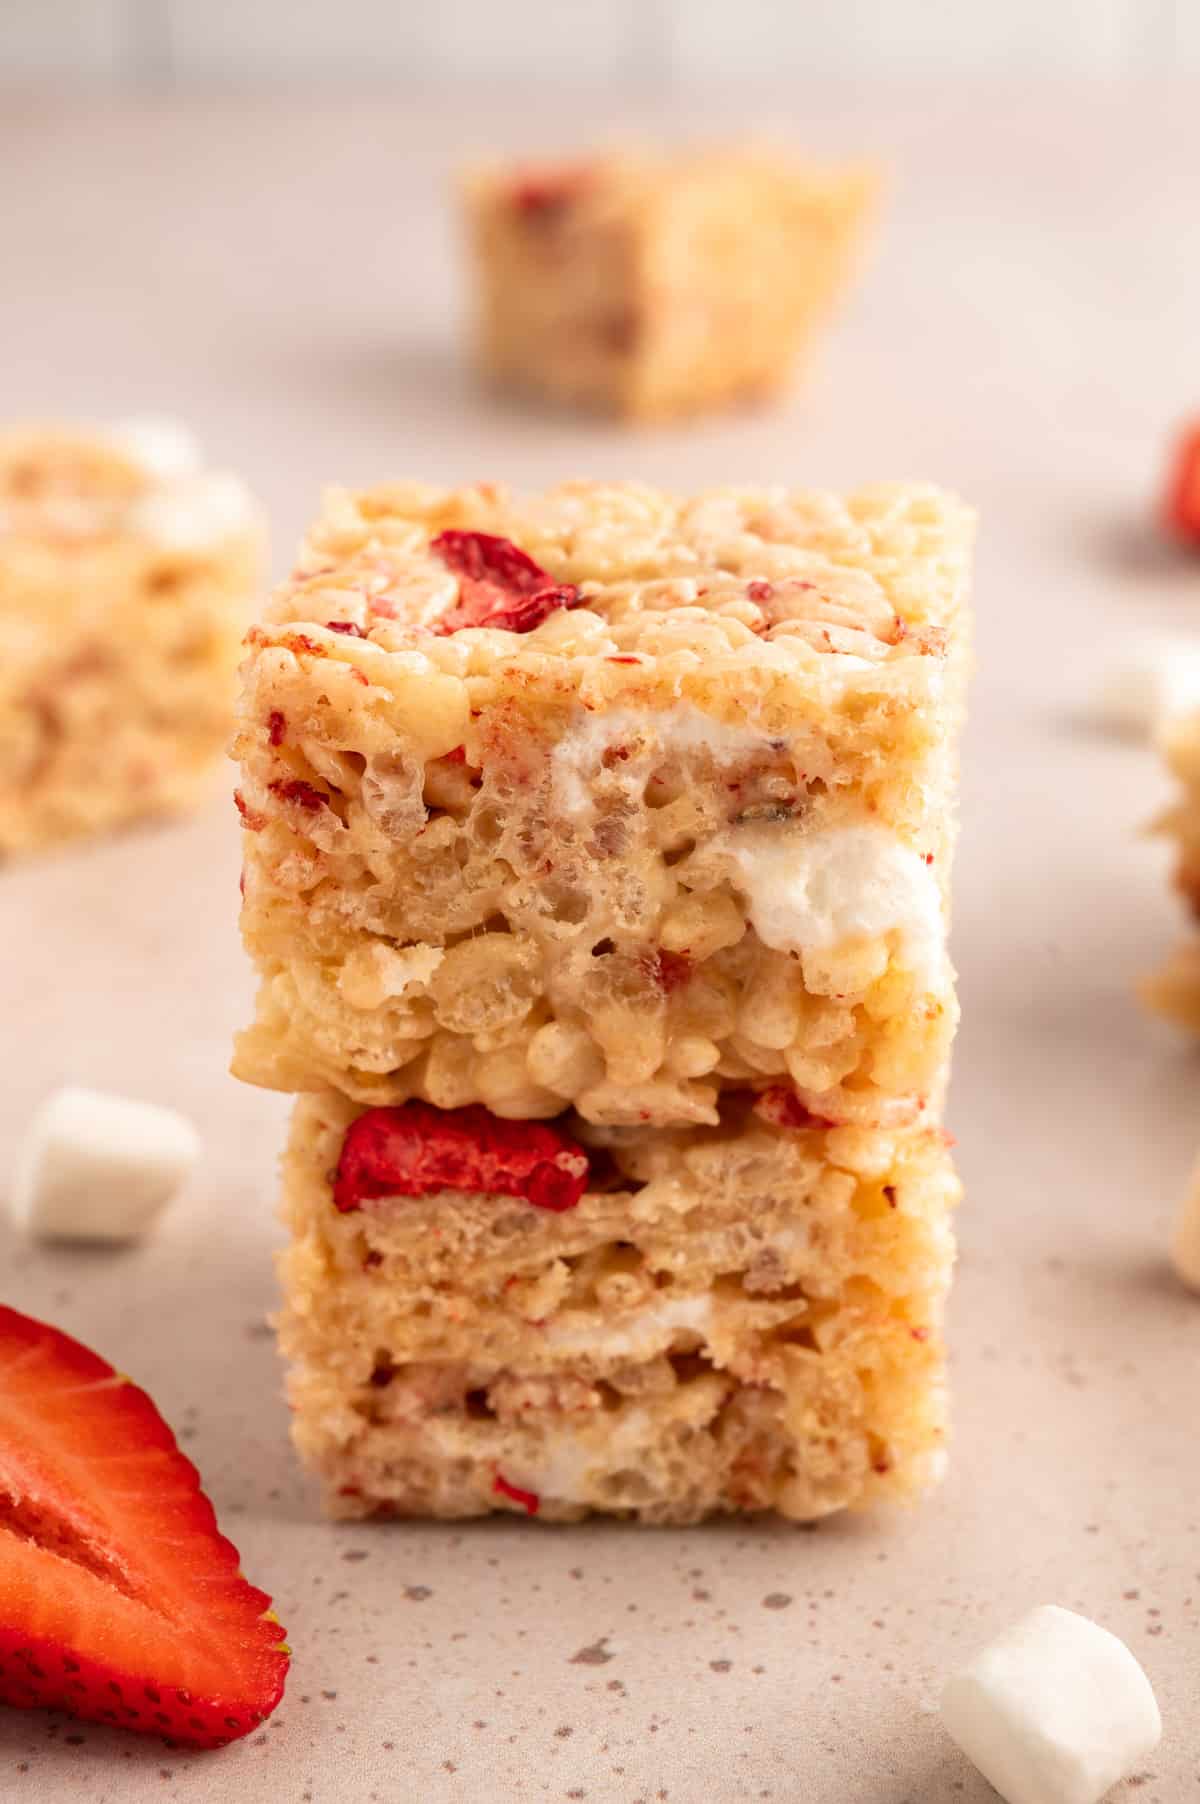
The extra cup of marshmallows should soften, but not fully melt into the treats. Leaving them unmelted will create soft, fluffy pockets in the Strawberry Krispie Treats when cut, for a nice contrast of texture with the crunchy cereal.
4. Assemble the Treats
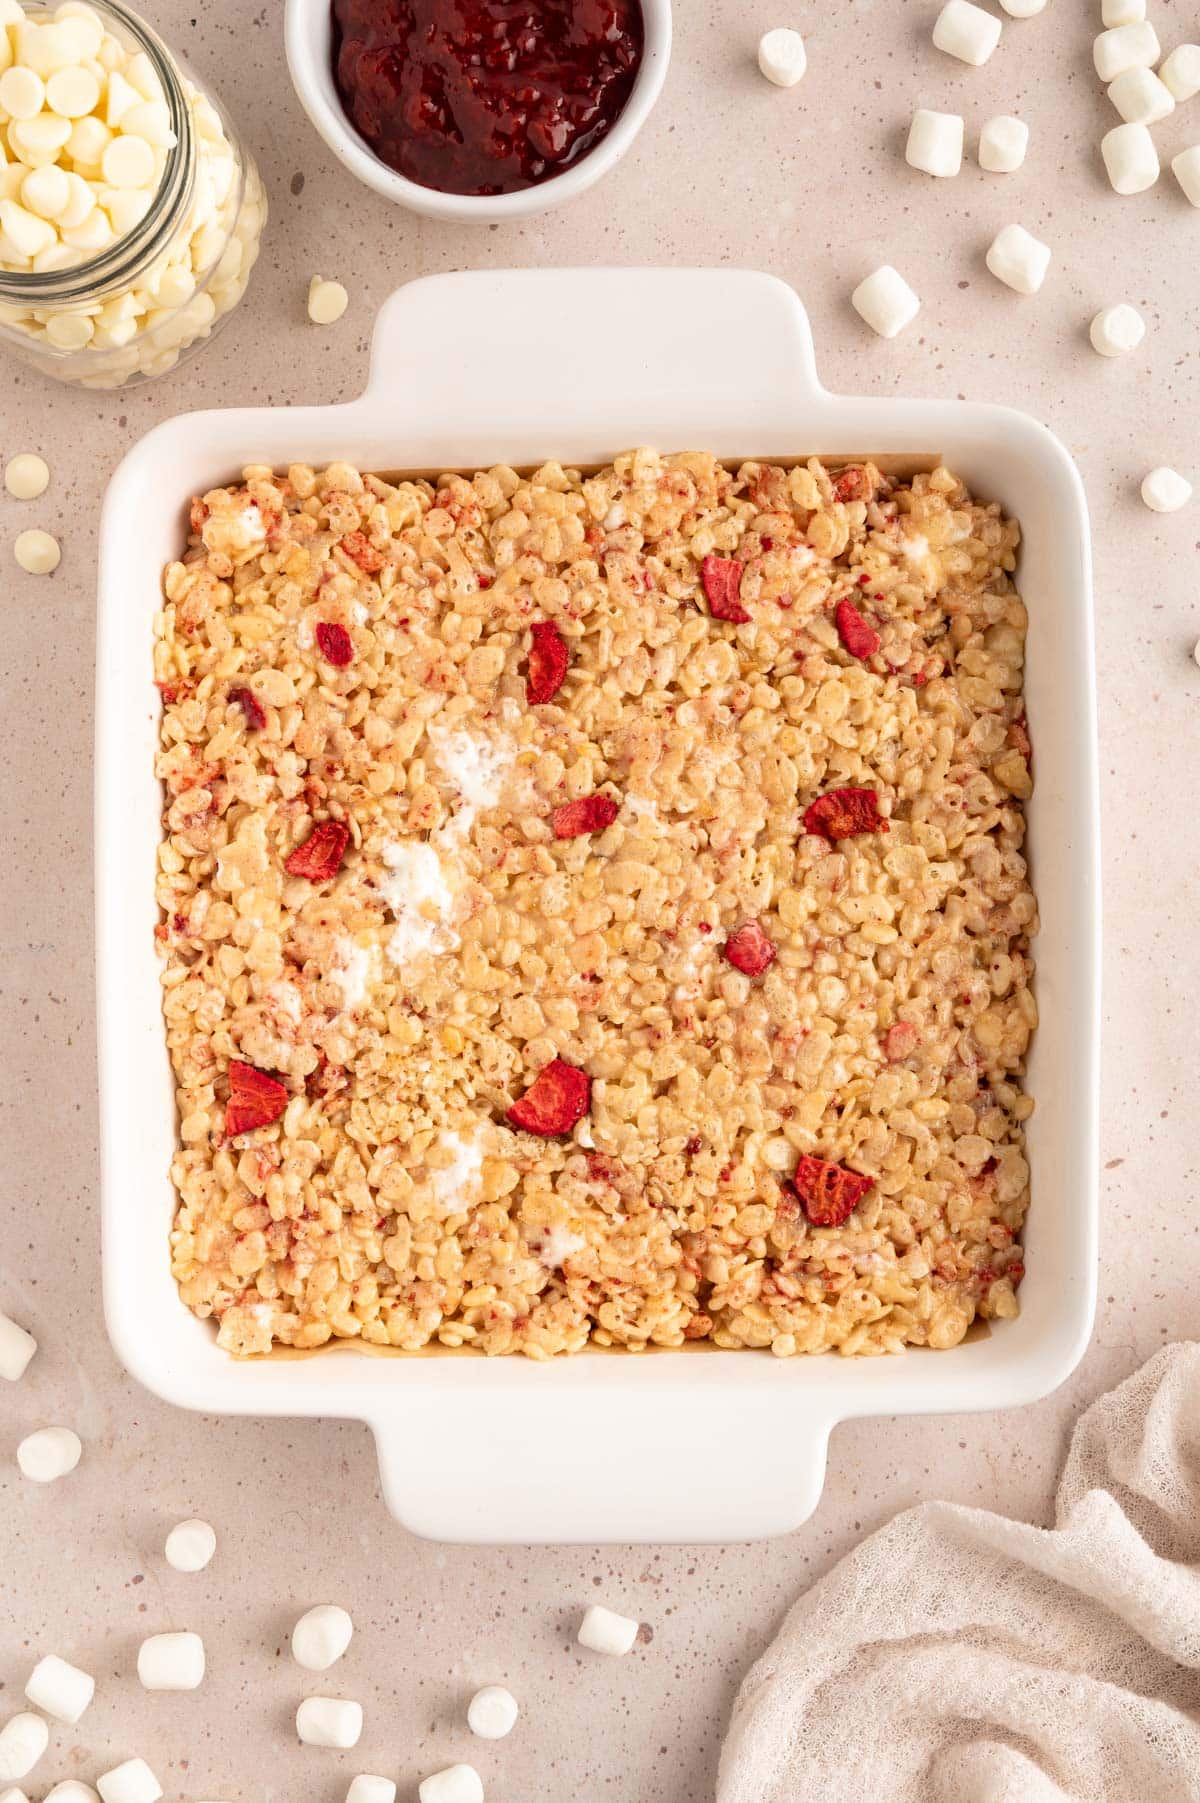
Spoon or pour the cereal mixture into the prepared baking dish. (I like to use a rubber spatula here.) Using a piece of parchment or a butter wrapper, pat the treats into an even layer from edge to edge.
I find that there’s a happy medium when packing Krispie treats into the pan. You want to press them firmly enough that the cereal sticks together to create clean cuts when cooled, but not so much that the treats are totally compact and tough. They should be roughly 2-inches thick if using an 8×8 pan.
Once the treats are packed, you can garnish them by pressing a few un-crushed pieces of freeze-dried strawberries into the top, if you’d like. (Keep in mind that these pieces of fruit will not remain crunchy.)
Let the Strawberry Rice Krispie Treats rest at room temperature for at least an hour (I prefer 2-3, when I have the time) before cutting and decorating.
5. Cut the Treats
When the treats have set, transfer them to a cutting board. You might need to run a knife around the edges of the pan that don’t have parchment for easy release.
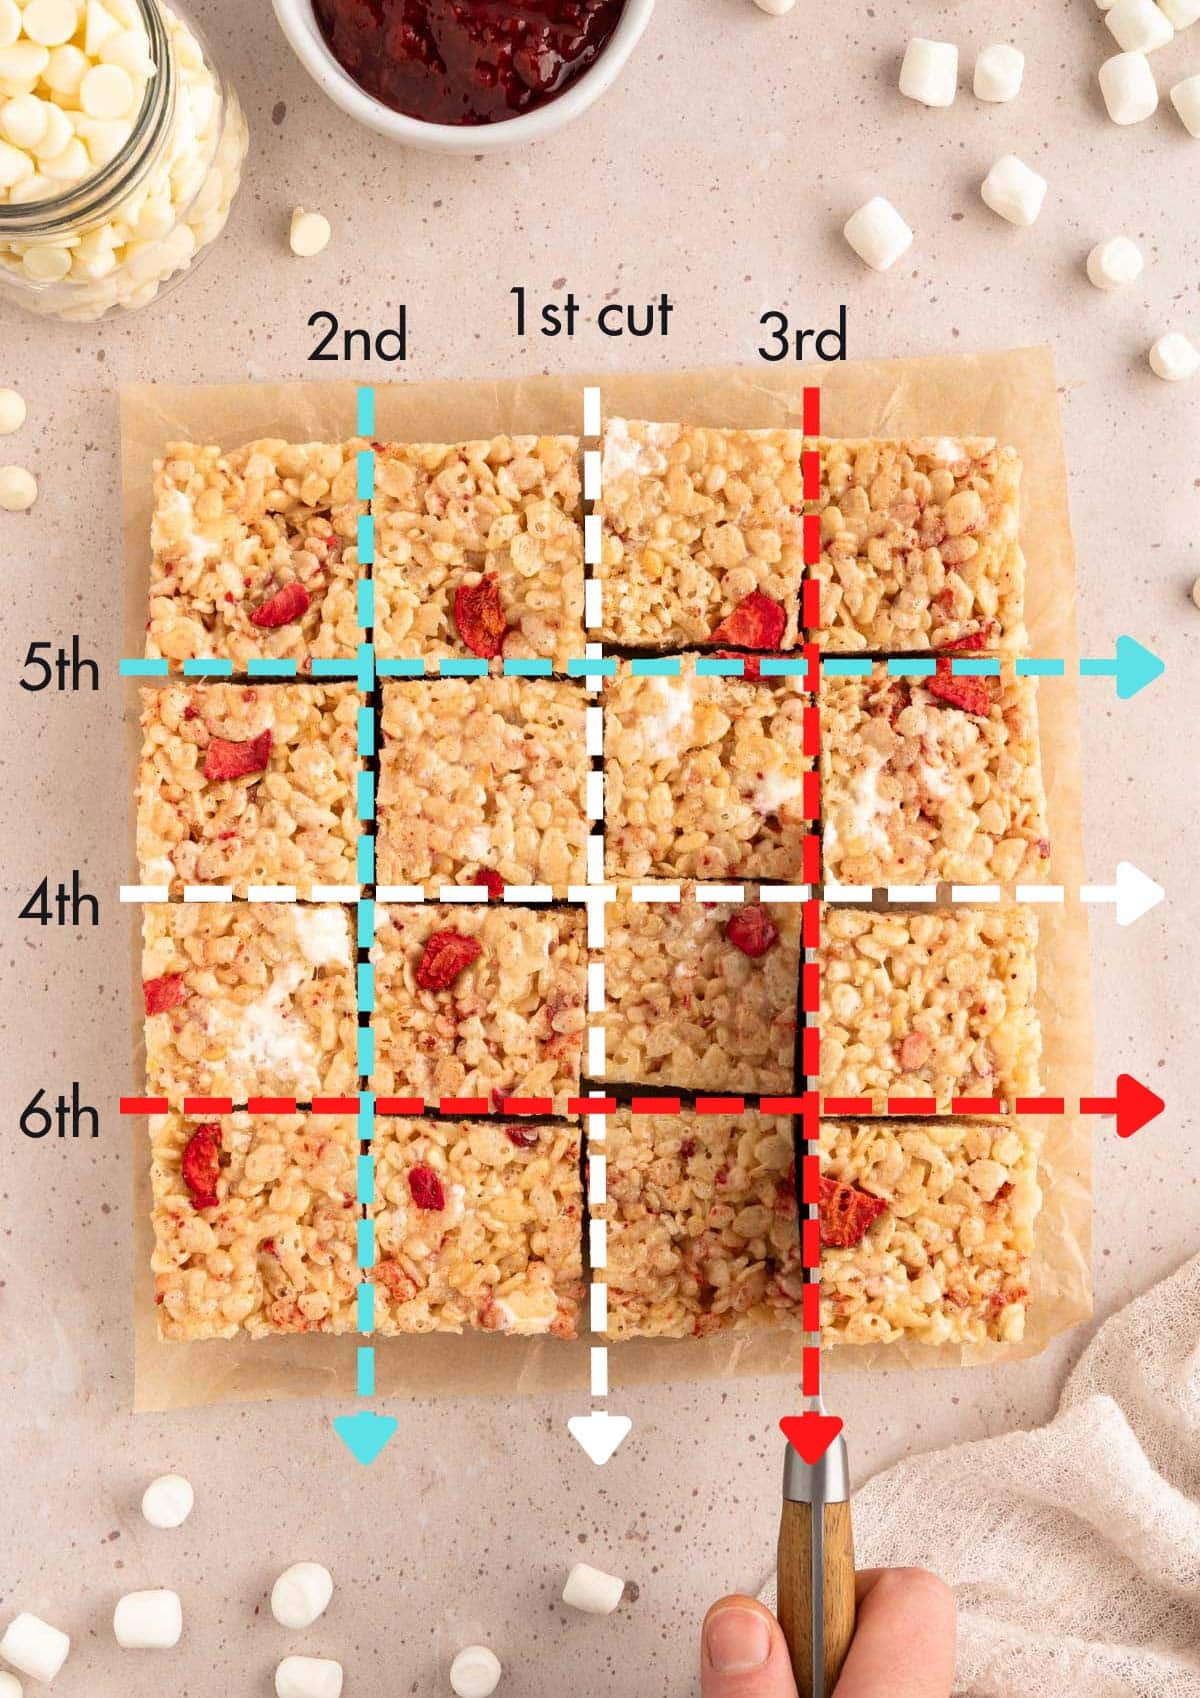
Cut the treats into 16 squares, about 2 inches wide. I like to use a sharp serrated or santoku knife for the cleanest edges.
I find that the best way to estimate even squares without measuring is to start by cutting the full pan of treats in half from edge to edge. Then, slice each half pan portion in half again from each side. You’ll make 3 cuts per edge.
That said, there’s no right or wrong way to cut these treats. I’ve just always found this method easier than eyeballing the cuts from left to right, whether I’m cutting Krispie Treats or a square pan of brownies or cookie bars.
6. Dip and Decorate (Optional but Fun!)
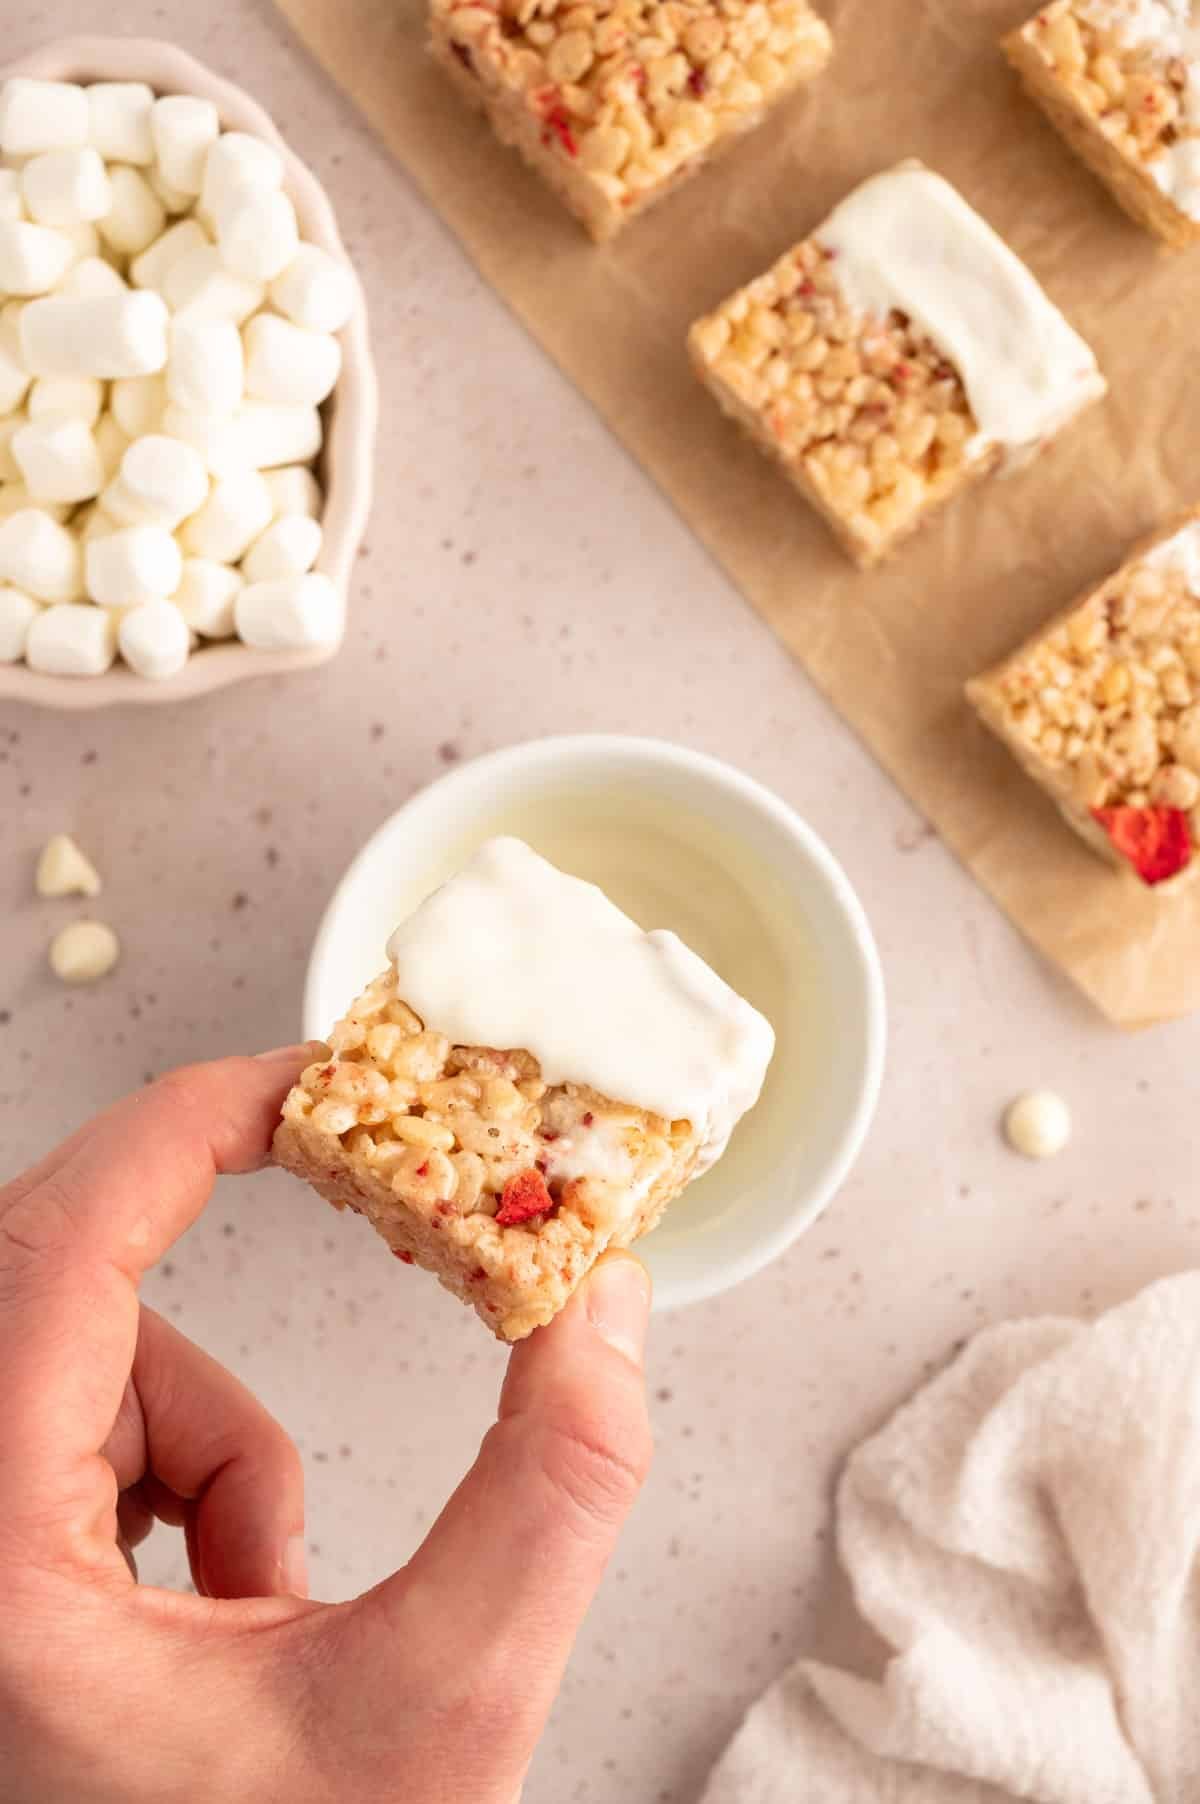
These Strawberry Rice Krispie Treats are absolutely delicious on their own, so if you wanted to stop at this point of the recipe, you certainly could. To make these treats extra special, though, I like to decorate them with either dipped or drizzled chocolate for a chocolate-covered strawberry vibe.
If you choose to dip the ends of the cut treats, select a small but deep bowl for melting the chocolate. If using a regular-sized bowl, you might need to use more chocolate or use a spoon to help cover the treats.
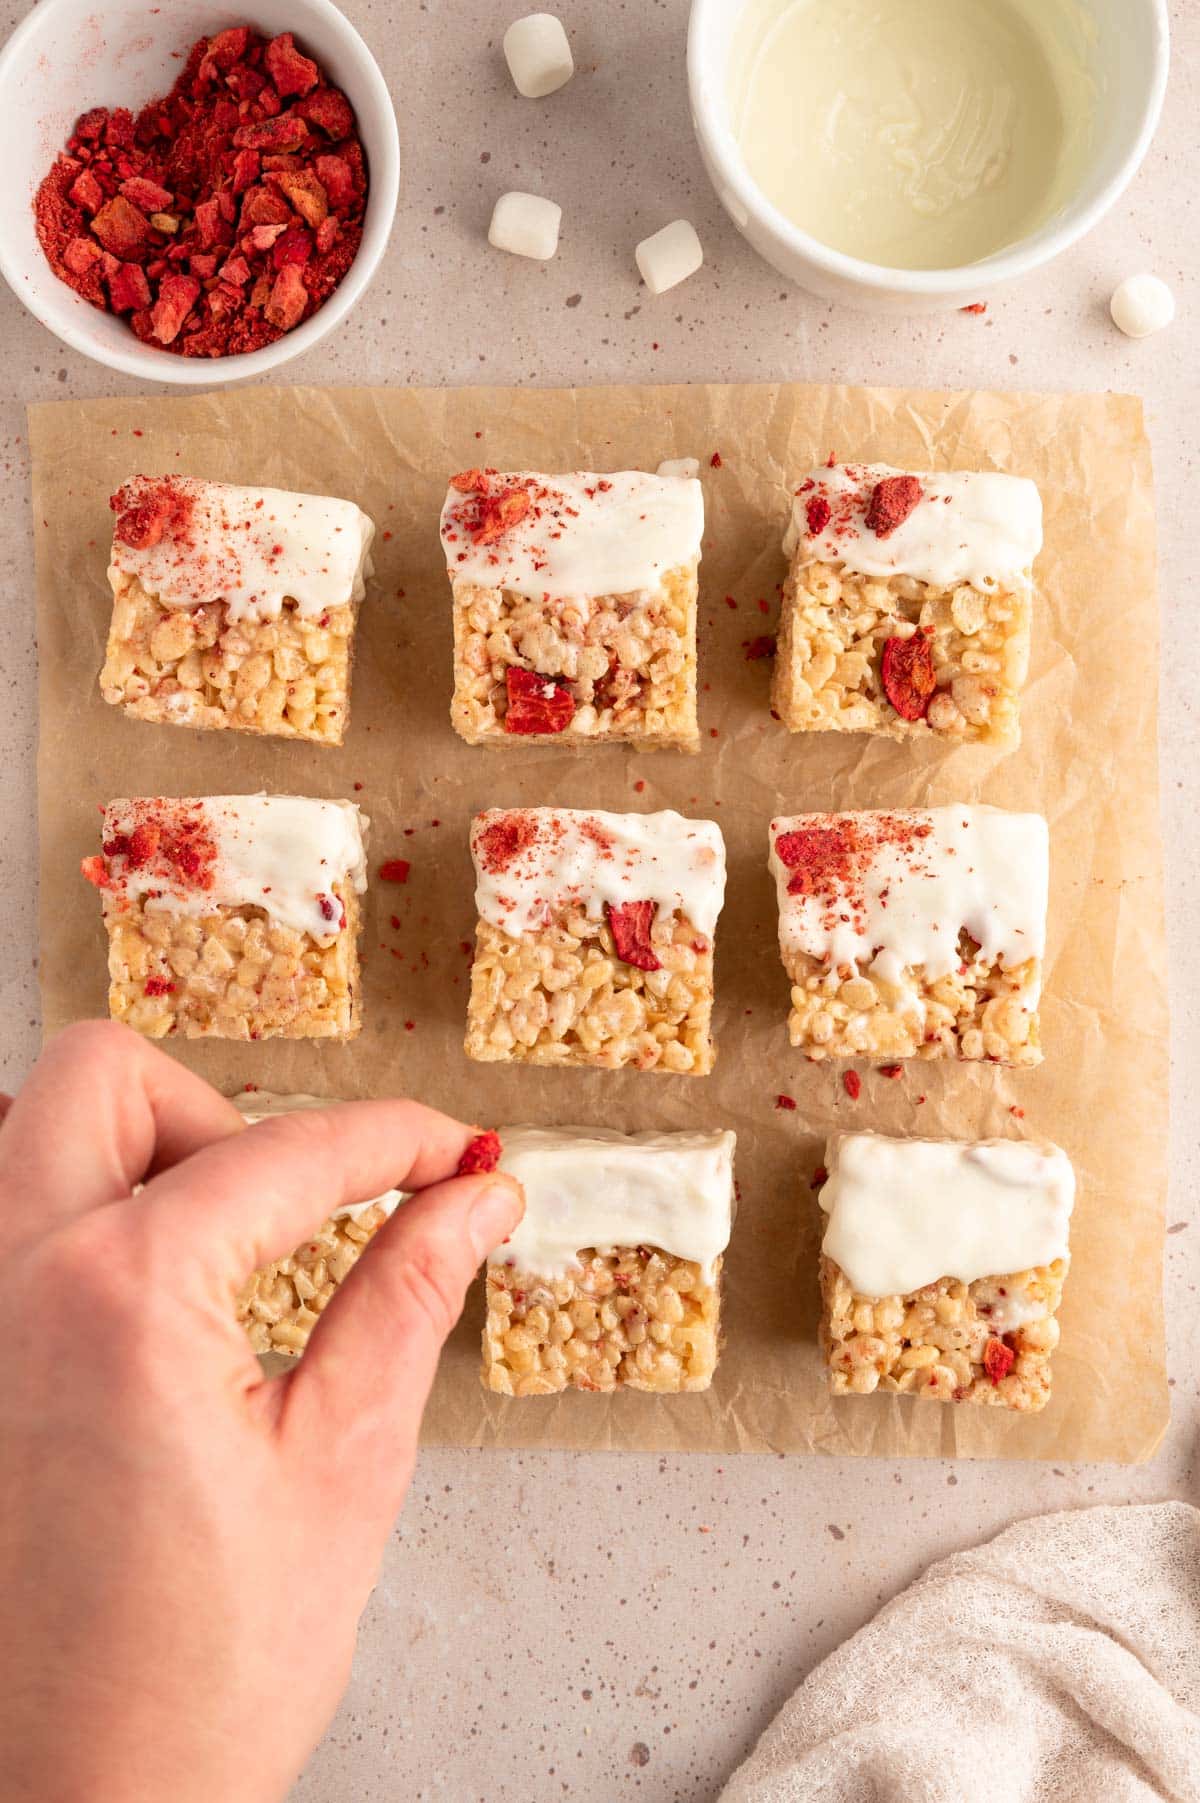
Once the treats are dipped, let any excess chocolate drip back into the bowl, and place the squares in a single layer on a piece of parchment. Let them stand at room temperature until the chocolate is firm.
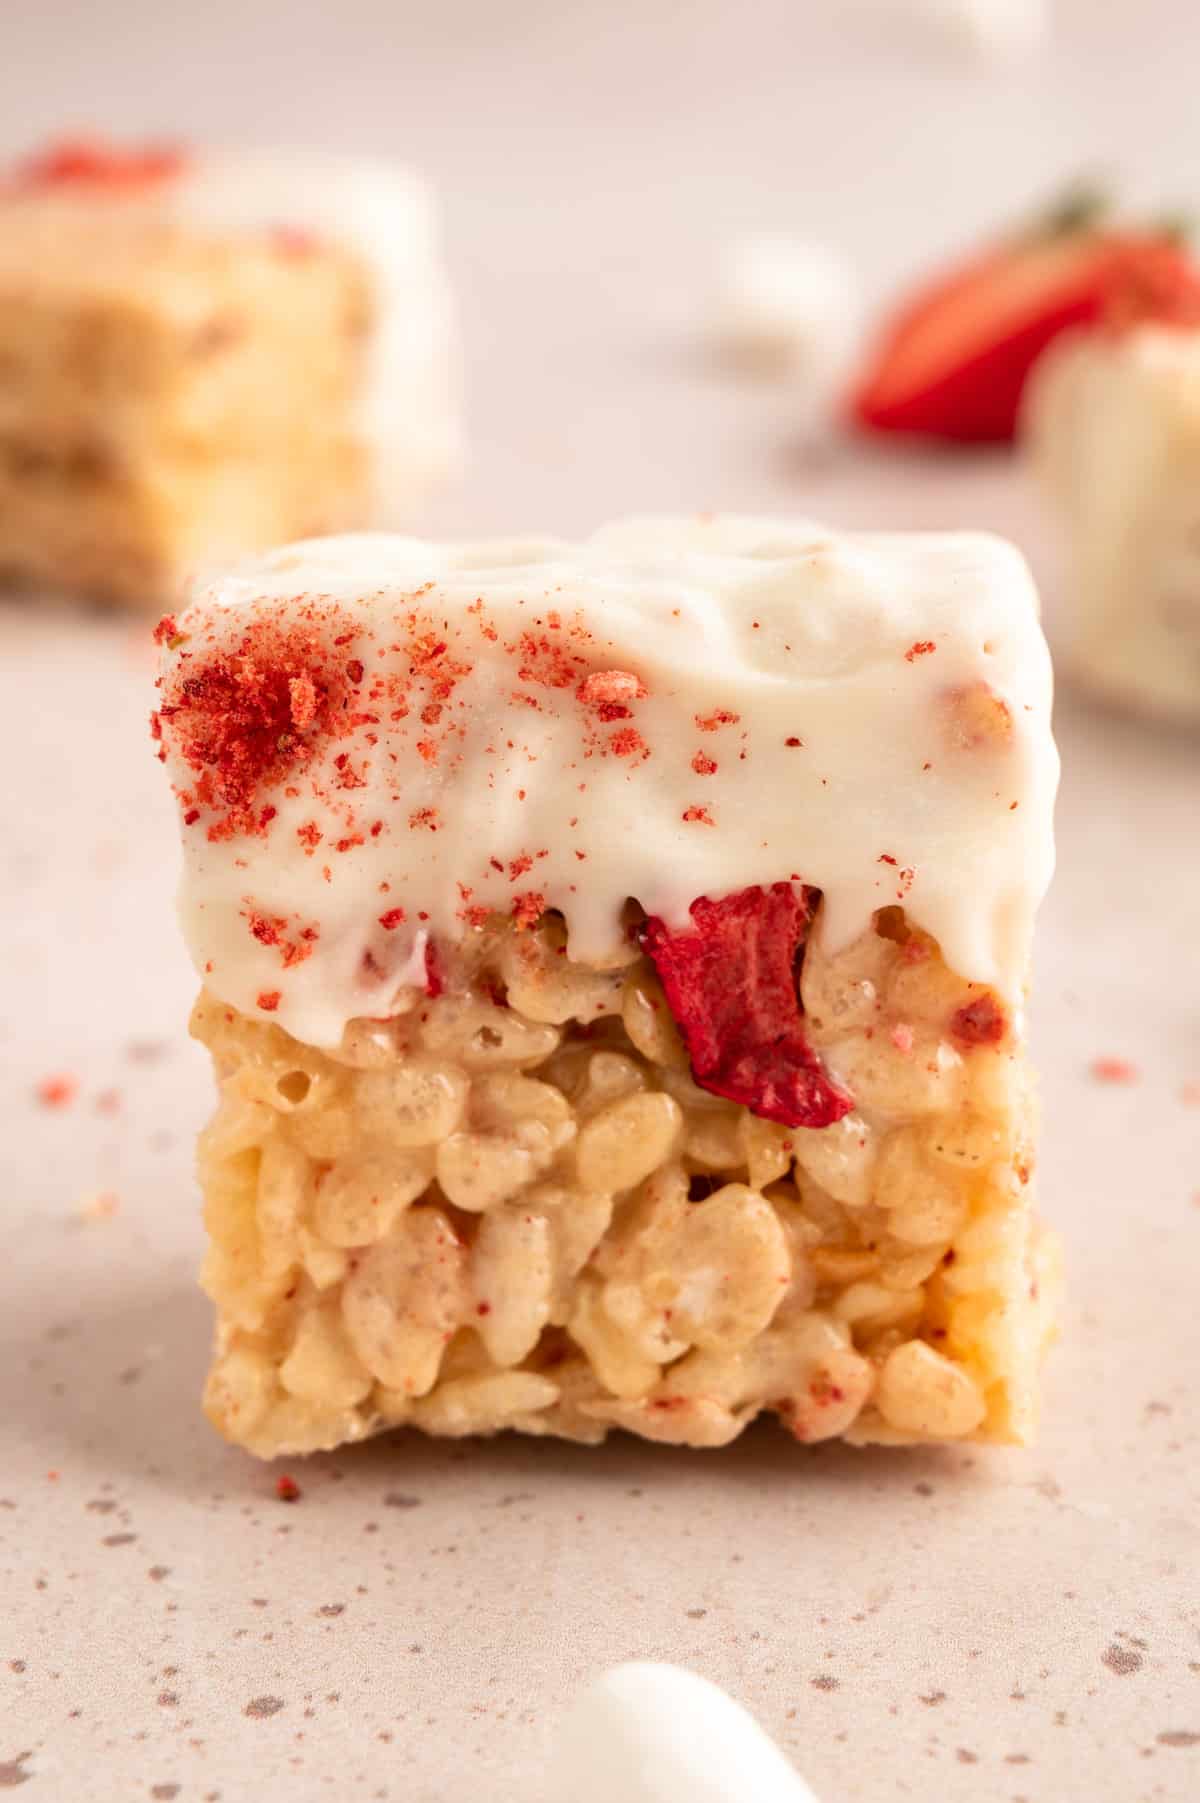
I also like to sprinkle the chocolate with a pinch of crushed freeze-dried strawberries before it sets for a pretty presentation. You can crush the strawberries a little more rustically for the garnish, leaving a few chunkier pieces (rather than the fine powder stirred into the treats earlier in the recipe).
Instead of dipping, you can also drizzle melted chocolate over the tops of the treats. I love the wisps of chocolate that you get in each bite with a drizzle.
To drizzle, use a fork or small spoon dipped in melted chocolate, using a zig-zag or swirl motion as you move over the treats. You can also put your melted chocolate in a pastry bag fitted with a very small round tip, or a plastic zip top bag with just a tiny bit of one of the bottom corners snipped off after filling.
FAQ’s
Q. Can I make this recipe dairy-free?
A. Dairy-free butter alternatives, including margarine, can generally be used to make Krispie treats. I have not, however, tested butter alternatives using this specific recipe.
Q. Why are my treats not firm and crispy?
The two main culprits for Krispie treats that are not firm and crispy are that they were either not packed into the pan enough or not set for long enough.
If you allowed proper time to set and packed your treats well using a piece of parchment paper or butter wrappers, consider your ingredient measurements. You want full but level scoops for both the cereal and marshmallows. (Weights are provided in the recipe; using a kitchen scale is always the most accurate!)
Q. Do I really need an extra 2 cups of miniature marshmallows or can I just use a 10-ounce bag?
A. You need it, trust me! One 10-ounce bag is not enough marshmallows for this recipe. If you include all the ingredients as listed you will be very pleased with the taste and texture of this twist on the classic recipe.
Q. How does the flavor differ from Strawberry Krispie Treats made with strawberry gelatin?
A. Since these treats use whole fruit preserves and freeze-dried strawberries, they are a bit less sweet than those made with flavored gelatin. The strawberry flavor of these treats is more sweet-tart, and reminiscent of fresh fruit.
Q. How should I store my treats?
A. These treats keep well in an airtight container (such as a storage tin or plastic zip top bag) at room temperature for up to 4 days. Do not refrigerate. The treats will become too firm in texture if chilled.
More of our Favorite Strawberry Recipes
- Croissant French Toast Bake with Berries
- Strawberry Basil Soda
- Strawberry Balsamic Salsa
- No Bake Cheesecake Cups (with Strawberry Pie Filling)
- Strawberry Mojito
CRAVING MORE? Subscribe to my newsletter and join me on Facebook, Pinterest, and Instagram for the latest recipes and news.

Strawberry Rice Krispie Treats
Ingredients
For the Krispie Treats
- 1/2 cup salted butter (8 tablespoons; I use European-style butter, such as Plugra or Kerrygold)
- 8 cups mini marshmallows divided (1, 10 oz. bag + 2 cups total or about 13.3 ounces total)*
- 3 tablespoons strawberry preserves
- 1/2 teaspoon vanilla extract (optional, but recommended)
- 3 tablespoons crushed freeze-dried strawberries (plus a few un-crushed slices for garnish, if desired)**
- 6 cups Rice Krispies or puffed rice cereal (180 g)
To Decorate (Optional)
- 1 cup white or dark chocolate chips or baking chips ***
- 1 teaspoon coconut oil
- 2 tablespoons crushed freeze-dried strawberries
Instructions
- Line an 8×8 baking pan with parchment paper and set aside. For easy treat removal, leave a 2-inch overhang on two sides.
- Melt butter in a large, heavy-bottomed pot or Dutch oven on the stove over medium-low heat.
- While the butter is melting, place freeze-dried strawberries in a small zip top bag and crush them with a rolling pin into a powder. (You can also pulse them in a food processor.)
- Once the butter is fully melted, add a 10-ounce bag of mini marshmallows and 1 additional cup of mini marshmallows to the pot. Lower the heat and stir continuously so that the sugars don't overheat or burn.
- When the marshmallows are almost melted, stir in the strawberry preserves and vanilla extract until well incorporated and the mixture is smooth.
- Remove the pot from the heat. Fold the cereal into the marshmallow mixture until combined (I like to use a rubber spatula).
- Stir in 3 tablespoons of crushed freeze-dried strawberries and the remaining 1 cup of marshmallows until evenly distributed. The extra marshmallows should soften, but not fully melt into the treats.
- Using a rubber spatula, transfer the cereal mixture into baking pan, spreading it out evenly. Use a piece of parchment paper or your empty butter wrapper to press the mixture to an even thickness of about 2 inches. (For the best treats, you'll want to press firmly enough that the cereal sticks to itself, but not so much that it compresses and becomes tough.)
- If desired, garnish the treats with a few larger pieces of dried strawberries, pressing them into the top of the cereal mixture.
- Allow the treats to set at room temperature for at least an hour. (I let them rest for 2-3 hours when I have the time.)
- Once set, remove the treats from the pan and cut them into 16 squares.
Dip or Drizzle (Optional)
- Place the chocolate chips and coconut oil in a small but deep bowl that will be used for dipping. Heat the chocolate in the microwave for 15-second intervals on medium power, stirring between each interval.
- Dip the ends of the cut treat squares into the melted chocolate, allowing the chocolate to drip off over the bowl for several seconds before placing them on parchment paper to set. While the chocolate is still wet, sprinkle a pinch of crushed freeze-dried strawberries onto each square. When the chocolate is running low, you may need to use a spoon to help coat the remaining few squares.
- Alternately, you can drizzle the tops of the treats with chocolate instead of dipping. Use a fork or spoon dipped into the bowl of chocolate and drizzle using a zig-zag or swirl motion over the treats. You can also place the melted chocolate in a pastry bag fitted with a very small round tip, or a plastic zip top bag with a tiny bit of one of the bottom corners snipped off.
- Allow treats to set for about 15 minutes and then enjoy! Store extras in an airtight container at room temperature for up to 4 days. Do not refrigerate.
Notes
Nutrition Estimate
Nutrition information is automatically calculated, so should only be used as an approximation.
About our recipes
Please note that our recipes have been developed using the US Customary measurement system and have not been tested for high altitude/elevation cooking and baking.


