

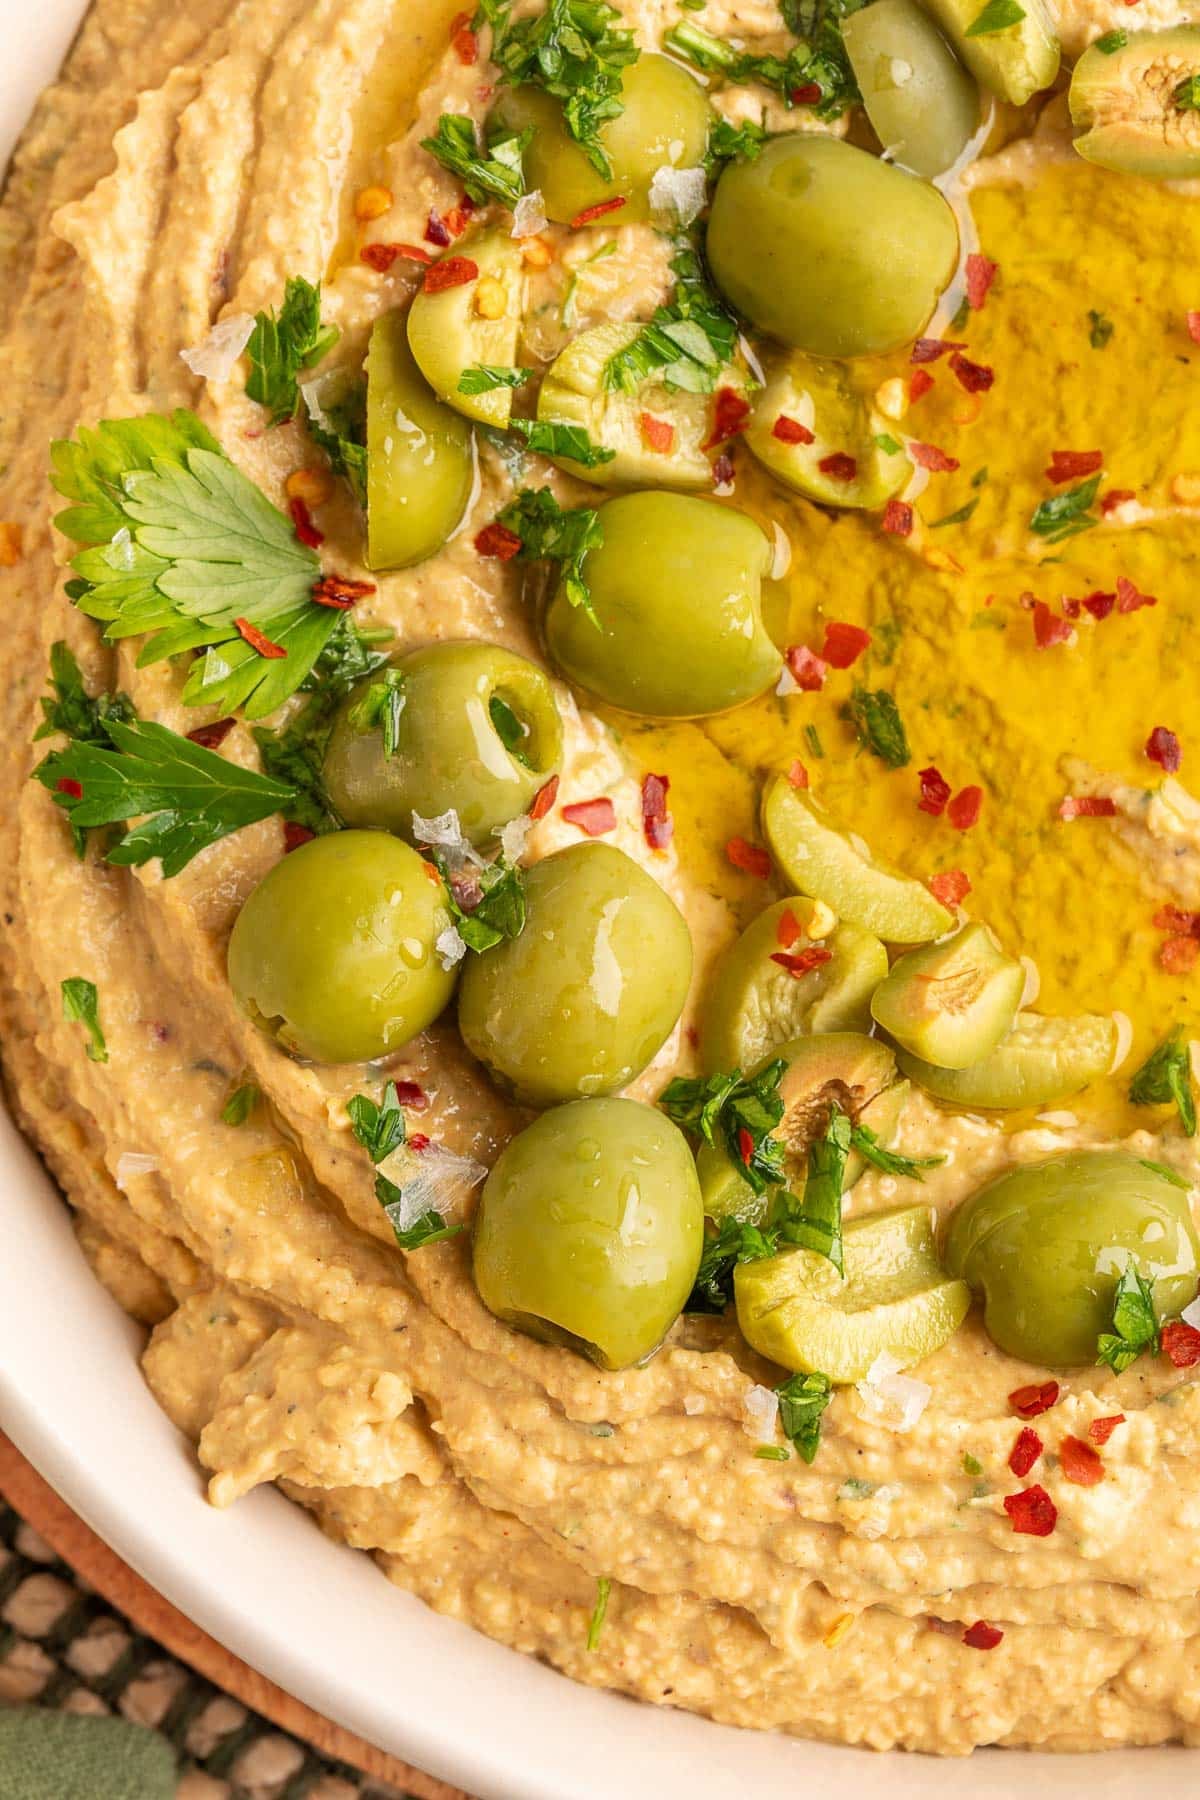
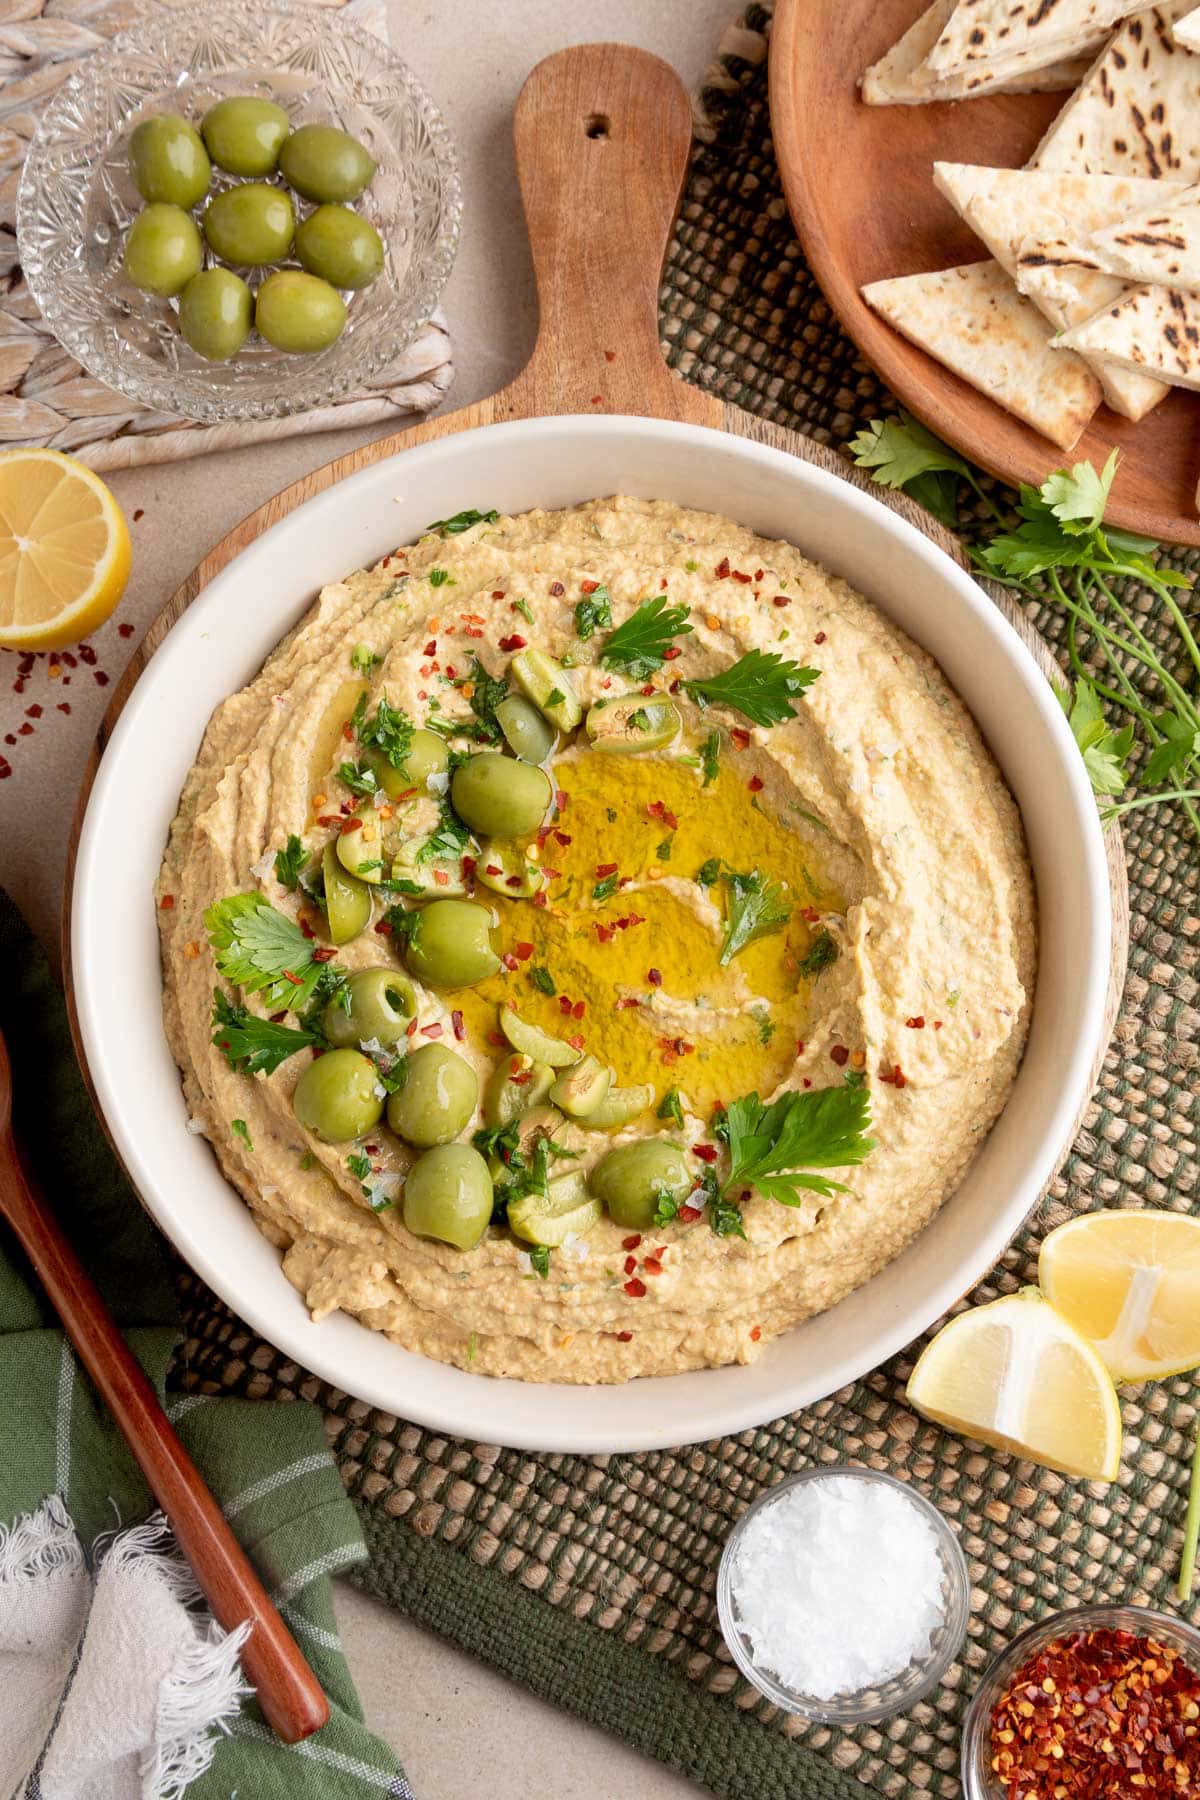
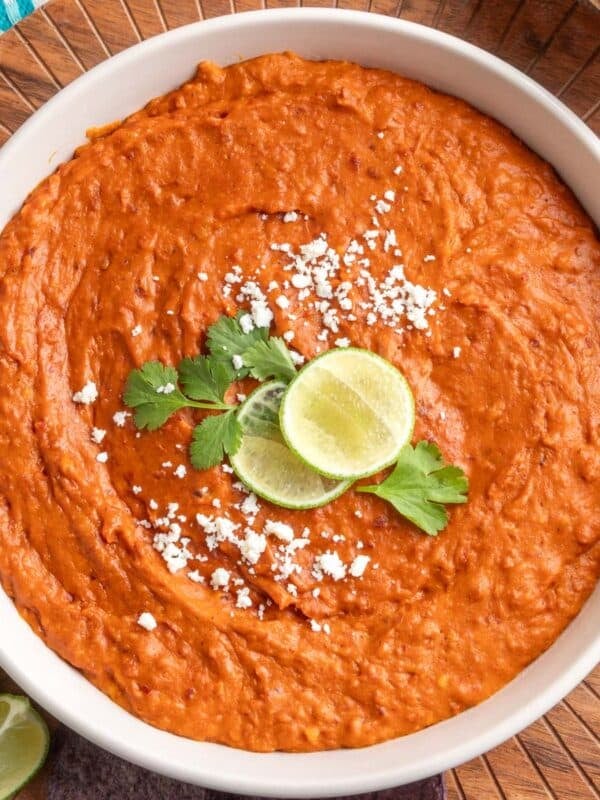
This easy-to-make Green Olive Hummus is bright, mildly briny, and creamy. Buttery olives blend with chickpeas, lemon, tahini, and garlic, while za’atar adds warmth and depth. It’s equally at home with a bowl of pita chips for snacking or served as part of a mezze-style spread.
If hummus is a favorite in your kitchen, you might also enjoy my creamy Roasted Red Pepper Hummus.

Before You Start Cooking
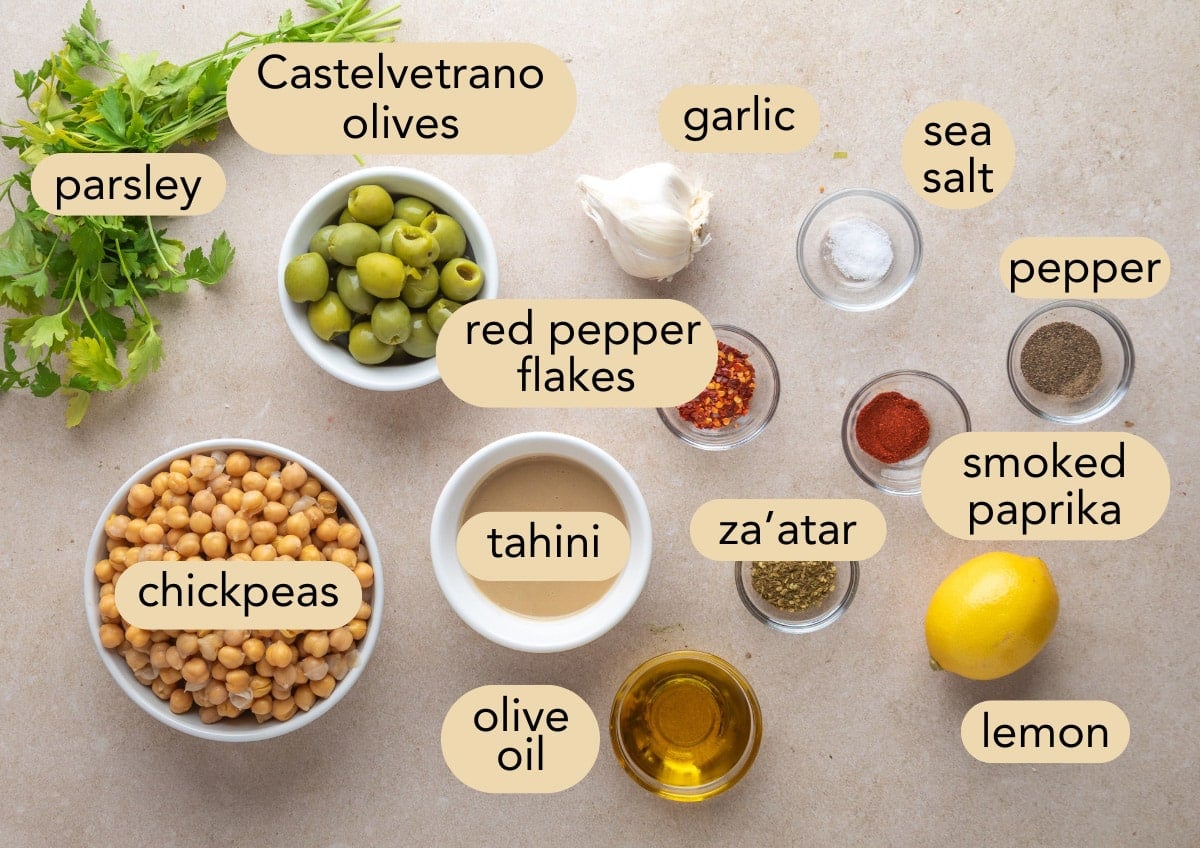
- Green Olives: This recipe uses pitted Sicilian Castelvetrano olives, which are mild, buttery, and less salty than many other green olives. Look for them at the olive bar (often near the specialty cheese counter) or jarred in the olive or international aisle.
- Make it Spicy: Use crushed red pepper flakes to add a little heat to this hummus. Or, leave them out for a mild, briny spread that’s still full of flavor.
- Chickpeas: Canned chickpeas work great here and are very convenient. If you like, you can also use home-cooked chickpeas from dried, which can give the hummus an even richer flavor.
How To Make Green Olive Hummus
This recipe comes together in about 10 minutes of prep, with a food processor for a whipped, creamy texture.
Note: the photos in this post show a party-sized, double recipe of hummus.
Step 1: Build the Base
To the bowl of your food processor, add the cooked chickpeas, along with the following ingredients (this section contains affiliate links):
- Olive Oil: Use a mild, buttery olive oil that won’t add bitterness or overpower the delicate flavor of the Castelvetrano olives.
- Tahini: Adds classic sesame flavor and body to the hummus. Tahini can vary in thickness and bitterness—I like Soom Premium Tahini, which is creamy and not bitter. Whichever brand you use, stir it thoroughly before measuring; tahini naturally separates into sesame paste and oil in the jar.
- Lemon Juice and Zest: For a bright, tangy flavor.
- Garlic: You can control how garlicky the hummus is by using 1 to 2 small cloves. To soften the bite of raw garlic, mince it and let it sit in the lemon juice for about 10 minutes before making the hummus.
- Dried Spices: Smoked paprika adds depth and smokiness, while za’atar—a spice blend made from sumac, toasted sesame, and herbs—adds nutty, tangy, aromatic flavor. Traditional za’atar uses an herb from the mint family called hyssop (you’ll find it in The Spice Way’s Real Za’atar), but many blends, such as Savory Spice Za’atar Seasoning, substitute herbs like thyme, marjoram, and oregano.
- Salt and Pepper: Sea salt and freshly ground black pepper round out the flavors. Add the salt conservatively to start—olives and chickpeas can vary in saltiness. If you’re making this hummus spicy, add the crushed red pepper flakes here as well.
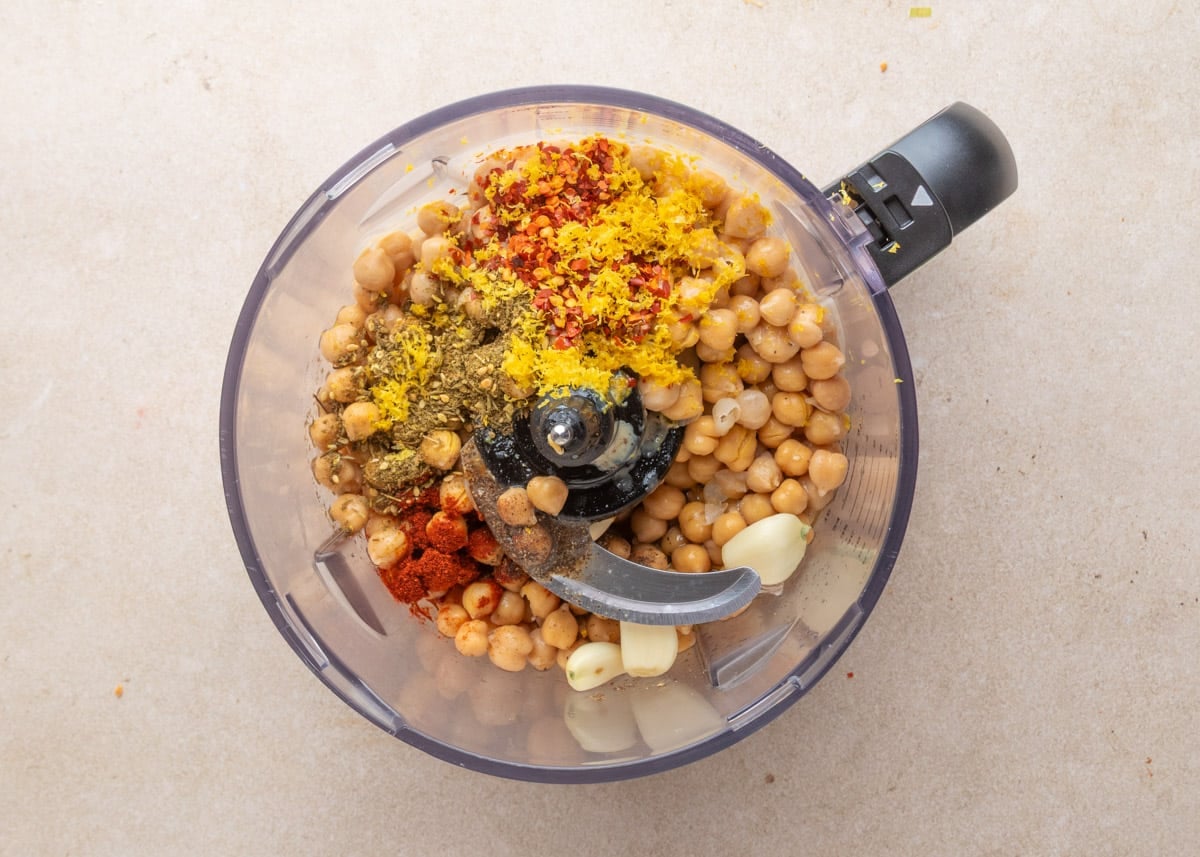
Process the mixture until it’s mostly smooth—you shouldn’t see any large pieces of chickpeas. This usually takes about 30 seconds, depending on your food processor and how soft your chickpeas were to start.
Be sure to stop the food processor and scrape down the sides of the bowl as needed so everything blends evenly.
Step 2: Add the Olives
Add the green olives to the food processor whole. Process the mixture again, just until the olives are very finely chopped and fully mixed in.
Give the hummus a taste and make any light adjustments. As I mentioned earlier, you might need to add a little more salt, depending on your olives and chickpeas.
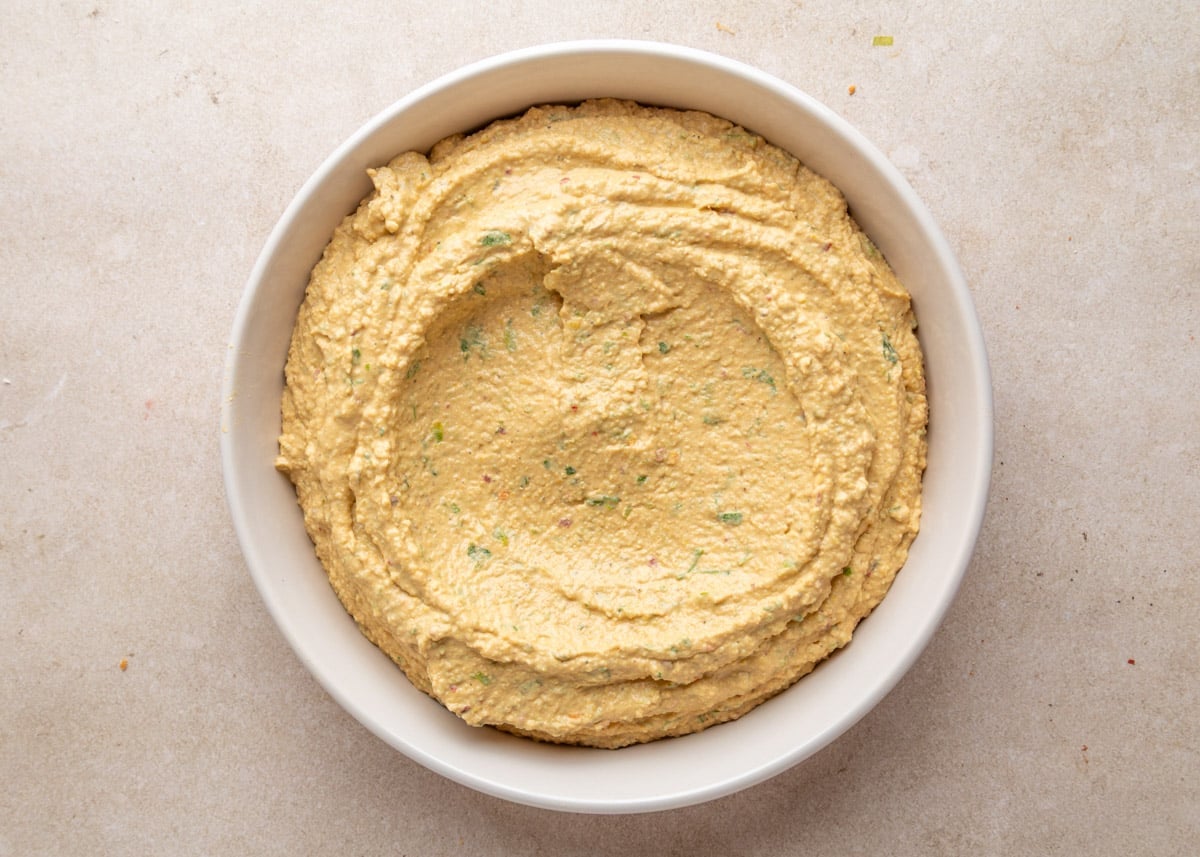
The hummus will look pretty thick at this point. Don’t worry—it will become silkier after whipping with ice water in the next step.

Step 3: Whip the Hummus
With the food processor running, slowly drizzle ice-cold water through the chute in the lid, adding about a tablespoonful at a time. As the hummus blends, you’ll see it turn lighter in color and take on a fluffier, whipped texture.
Using ice water is key here for emulsifying the tahini and chickpeas. This is what creates that pale, airy, craveable hummus consistency you get in restaurants.
You might not need the full amount of water the recipe calls for, and the exact amount can vary from batch to batch. Stop adding water once the hummus looks whipped, fluffy, and scoopable.
Step 4: Finish and Chill
Transfer the hummus to a bowl or storage container and gently fold in very finely chopped flat-leaf Italian parsley. I like to add the parsley by hand so it doesn’t add a green hue to the hummus when blended.
Cover the bowl and refrigerate the hummus for at least an hour to let the flavors meld and mellow. Just before serving, taste again and make any final tweaks to the salt, lemon, or heat level.
Serving Green Olive Hummus
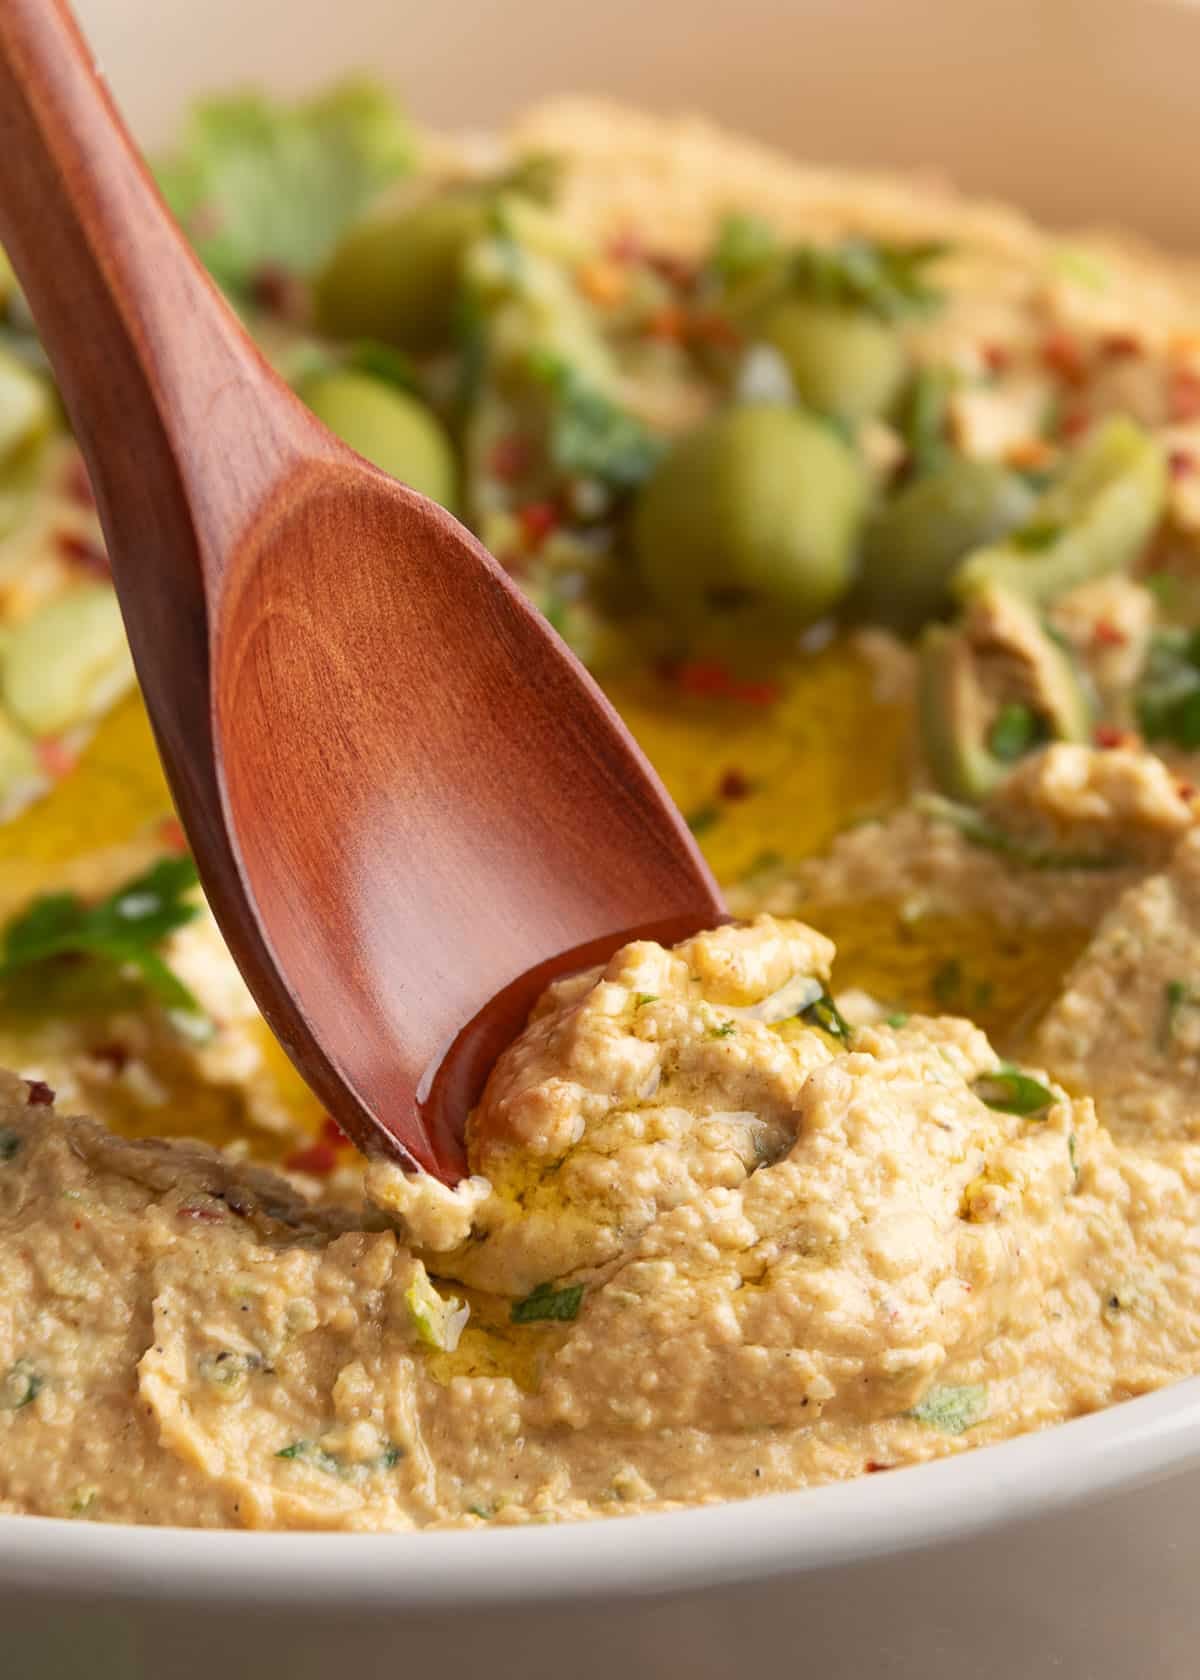
Use the back of a spoon to swirl the top of the hummus into a few shallow valleys and drizzle generously with extra-virgin olive oil. Garnish with whole olives, a pinch of flaky sea salt, chopped parsley, and red pepper flakes if you’d like a little extra heat.
While I use a mild-tasting olive oil in the hummus itself, you can go a little fruitier or more peppery for drizzling on top if you prefer. I’d still avoid anything too robust, though, so it doesn’t take over the Castelvetrano olives.
Green Olive Hummus is utterly delicious when scooped up with warm or grilled pita bread wedges. It’s also just as good with pita chips, seeded crackers, or crisp vegetables like cucumber slices, radishes, and bell peppers.
I also love serving it as part of a mezze-style spread alongside marinated vegetables, feta, and grilled flatbread. You can also use it as a flavorful spread for sandwiches and wraps.
Entertaining Tip
If you’re serving this Green Olive Hummus as part of a snack board for a larger gathering, make a double batch and transfer it to a wide, shallow bowl. It’s easier for guests to scoop, and the extra surface area really shows off the olive oil and toppings.
Make Ahead and Storage
Green Olive Hummus is an ideal make-ahead dip and actually tastes better after it’s had time to rest.
If you’re making this ahead for a party, remember that garlic becomes more pronounced over time. I usually go a little lighter on the garlic when I know the hummus will be sitting for a day or two.
Make Ahead: Prepare the hummus up to 3 to 5 days in advance and store it in an airtight container in the refrigerator. Hold off on topping it with olive oil, extra olives, or garnishes until just before serving.
Before Serving: Let the hummus sit at room temperature for about 10 minutes to soften slightly, then give it a taste and adjust the seasoning if needed. If the texture has thickened too much, stir in a little cold water, a teaspoonful at a time, to thin it out.
I don’t recommend freezing this hummus—it can become grainy when thawed.
More Mediterranean Dips and Spreads

Green Olive Hummus
Ingredients
- 1 (15 ounce) can chickpeas , drained and rinsed (or 1-1/2 cups cooked chickpeas)
- ¼ cup tahini (see Note 1)
- 3 tablespoons fresh lemon juice
- 2 tablespoons mild-tasting olive oil , plus more for serving (see Note 2)
- 1 to 2 small garlic cloves (depending on how garlicky you like your hummus – see Note 3), peeled
- 1 teaspoon finely-grated lemon zest
- ¾ teaspoon za'atar seasoning (see Note 4)
- 1 teaspoon crushed red pepper flakes (optional, for a spicy kick), plus more for serving
- ¼ teaspoon smoked paprika
- ¼ teaspoon freshly-ground black pepper
- ¼ to ½ teaspoon fine sea salt (see Note 5)
- ½ cup pitted green Castelvetrano olives , lightly packed, plus more for garnish
- 2 to 5 tablespoons ice water
- ¼ cup flat leaf parsley leaves , very finely chopped (see Note 6), plus more for serving
Instructions
- In a food processor, combine the chickpeas, olive oil, tahini, lemon juice, garlic, lemon zest, za’atar, smoked paprika, black pepper, salt, and crushed red pepper flakes (if using). Process until a thick paste forms with no large chickpea pieces, about 30 seconds. Stop the food processor and scrape down the sides of the bowl as needed.
- Add the olives and process again until evenly blended, about 20 seconds. Taste the mixture and add additional salt, if needed.
- With the food processor running, slowly drizzle in the ice water a tablespoon at a time through the feed tube. Process until the hummus turns lighter in color and takes on a fluffy, whipped texture. You may not need the full amount of water—stop when the hummus is smooth, airy, and scoopable.
- Transfer the hummus to a bowl and fold in the finely chopped parsley by hand until evenly distributed.
- Cover tightly and refrigerate for at least an hour, then taste again and make any final adjustments to salt, lemon, or spice before serving.
- Spoon the hummus into a serving bowl. Swirl the top with the back of a spoon, drizzle with olive oil, and garnish with additional olives, chopped parsley, and red pepper flakes, if desired.
- Serve with grilled pita wedges, pita chips, crackers, or crudités.
Notes
Nutrition Estimate
Nutrition information is automatically calculated, so should only be used as an approximation.
Please note that our recipes have been developed using the US Customary measurement system and have not been tested for high altitude/elevation cooking and baking.
You may also like:
Dips & Spreads
Mexican Street Corn Dip
Dips & Spreads
Crab Rangoon Dip
Dips & Spreads
Chorizo Bean Dip with Chipotle

Appetizers
