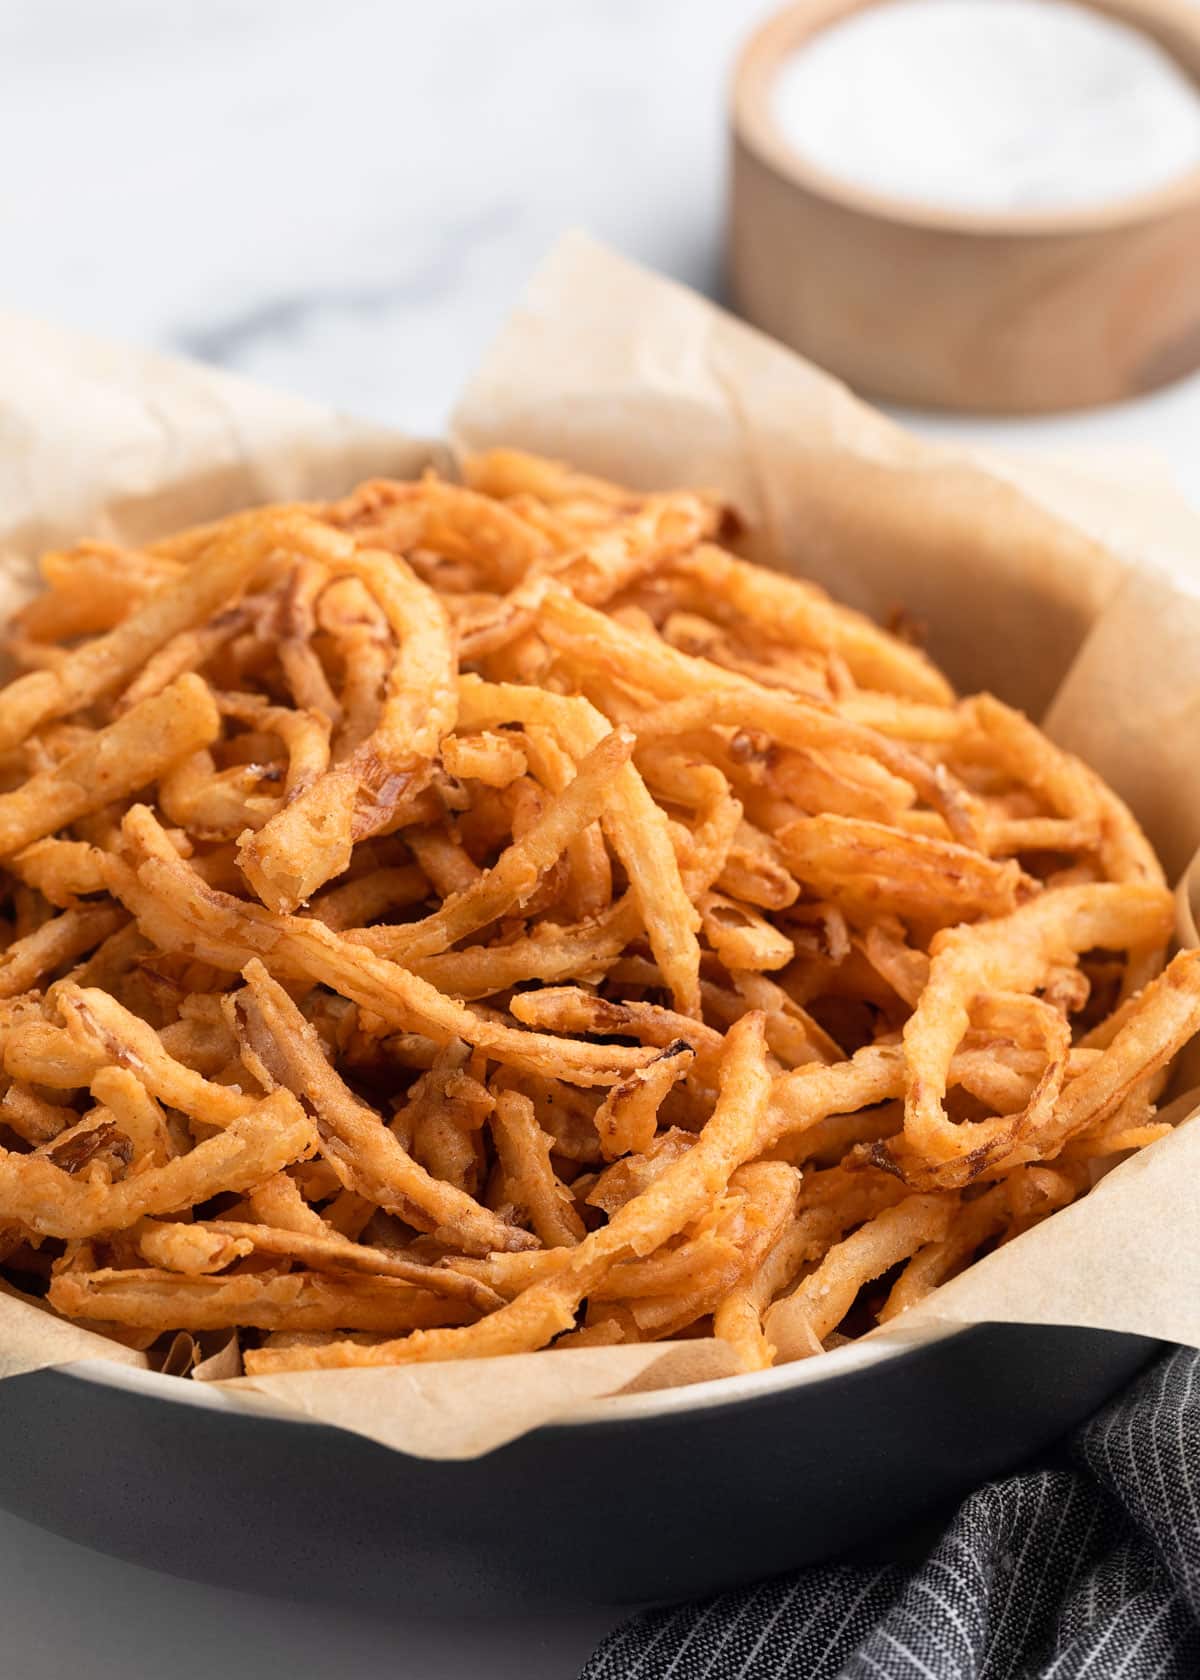
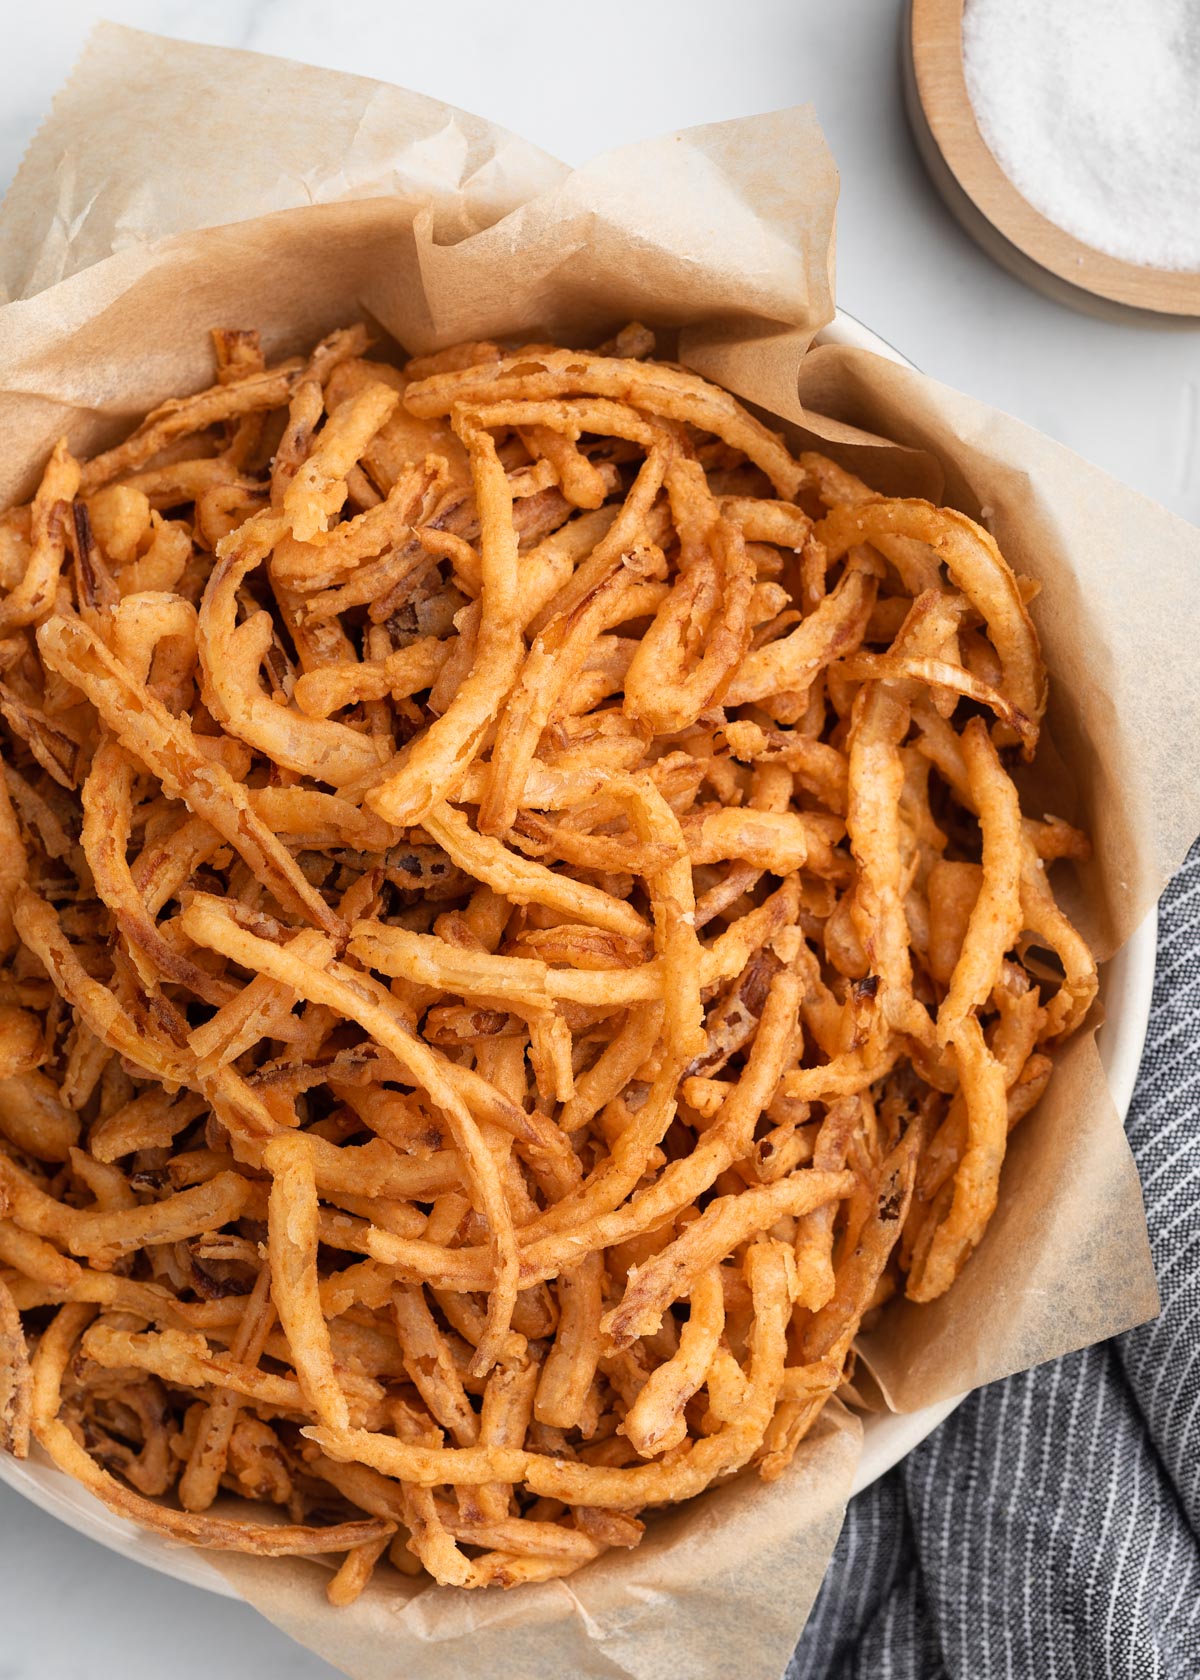
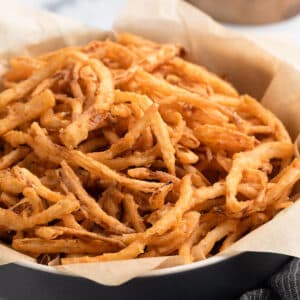
Homemade French Fried Onions (crispy onion strings) are simple to make and add great texture to all kinds of dishes. They’re light, crisp, and lightly seasoned, with a bit of natural sweetness from the onions. Serve them on casseroles, salads, burgers, or snack on them straight from the tray.
After making them, you’ll find yourself topping more than just your Thanksgiving green beans!
Before You Start Cooking
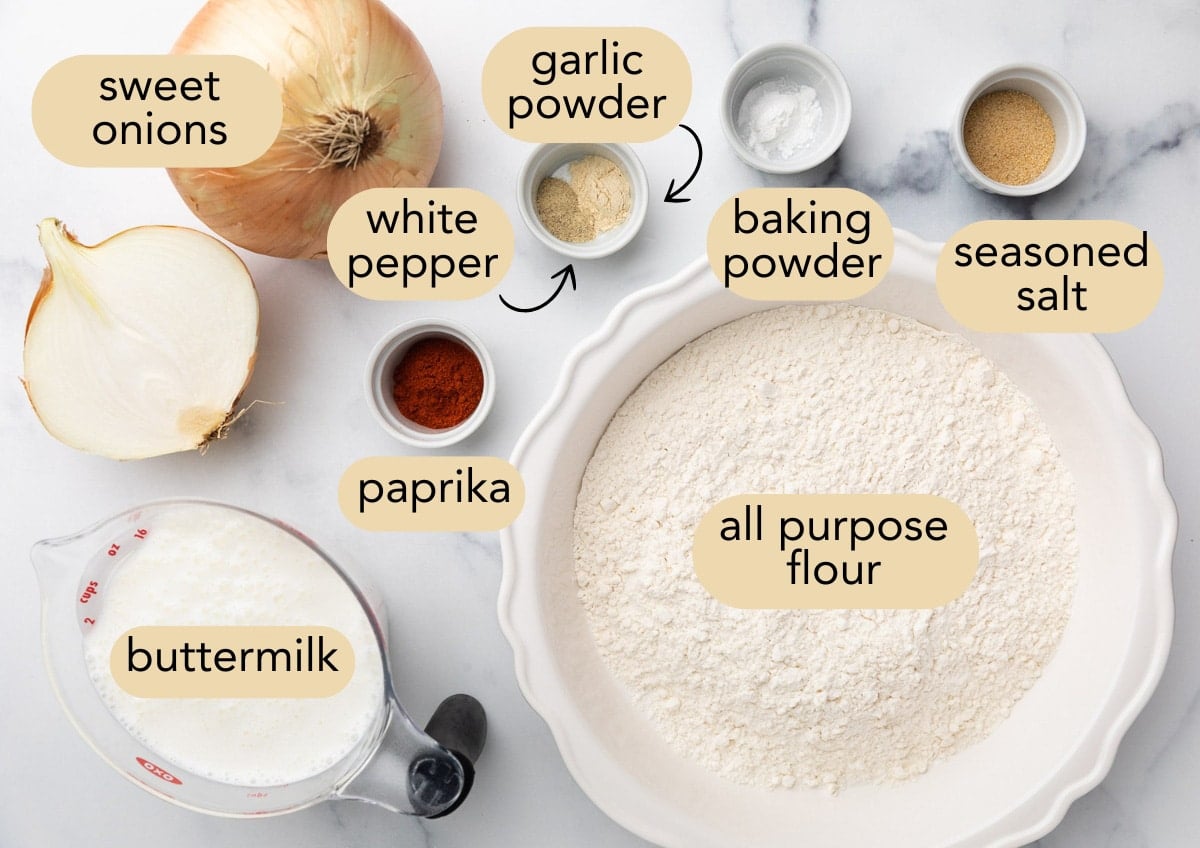
- Onion Choice: While you can use yellow onions, large sweet onions like Vidalia or Walla Walla are the best choice here. Their natural sugars balance the savory coating when fried.
- Slice Evenly: Thin, uniform slices are key for even cooking and crispness. Aim for 1/16- to 1/8-inch-thick slices using a sharp knife or mandoline. Thinner onions fry faster and become crispier.
- Make Ahead: The texture is best when these crispy onion strings are freshly fried, but if you’re making them a couple of days ahead, they can be refreshed in the oven.
How to Make French Fried Onions
Step 1: Slice and Soak the Onions
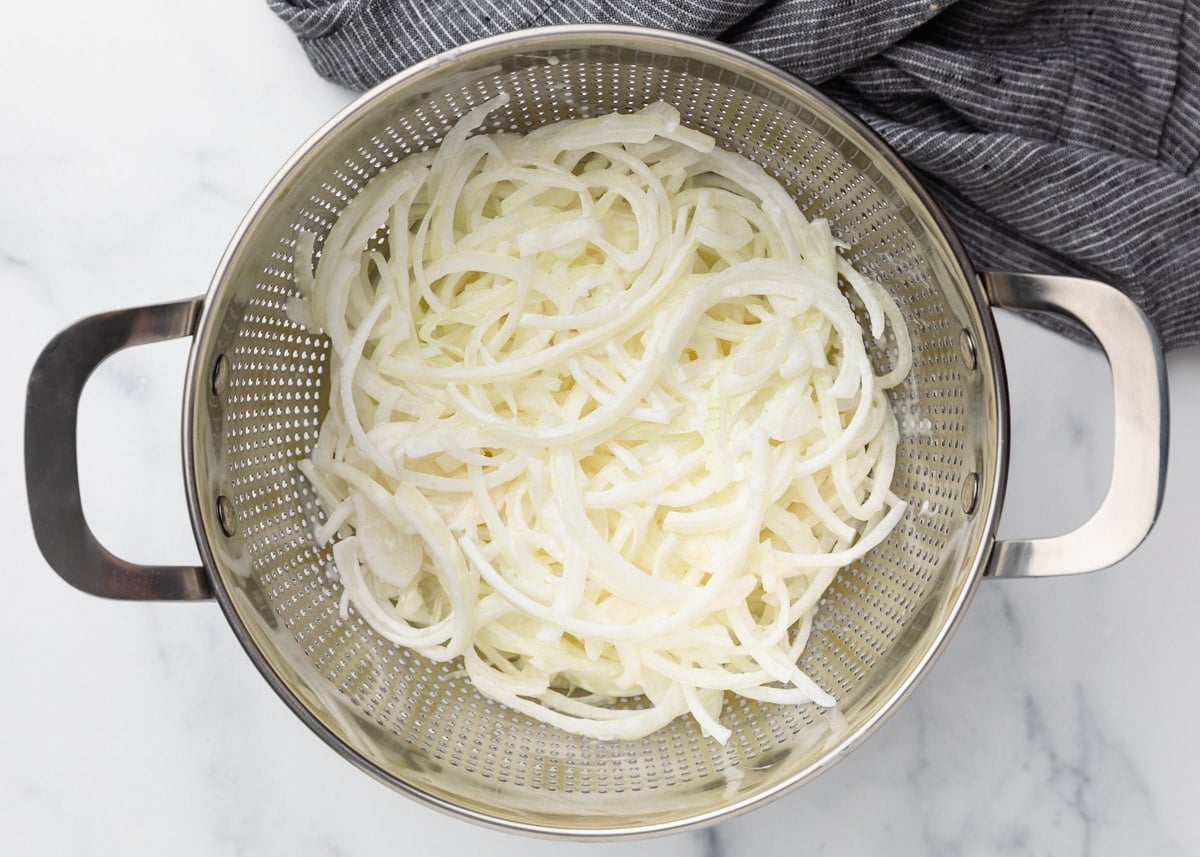
Start by halving a large sweet onion lengthwise through the root and peeling it. Slice each half crosswise into very thin half-moons, then separate the layers into individual “strings.”


If you’re using smaller yellow onions, skip halving them and slice them whole for small rings—just be sure to separate the layers before soaking.
Place the onions in a medium bowl and cover with buttermilk, stirring gently to coat and submerge them fully. Let them soak for 30 minutes, stirring once or twice during that time. The buttermilk tenderizes the onions and helps the seasoned flour adhere.

After 30 minutes, drain the onions well in a colander. Let the excess buttermilk drip off thoroughly—too much liquid will make the coating gluey and clumpy, causing the onion strings to stick together.
Step 2: Prepare the Seasoned Coating
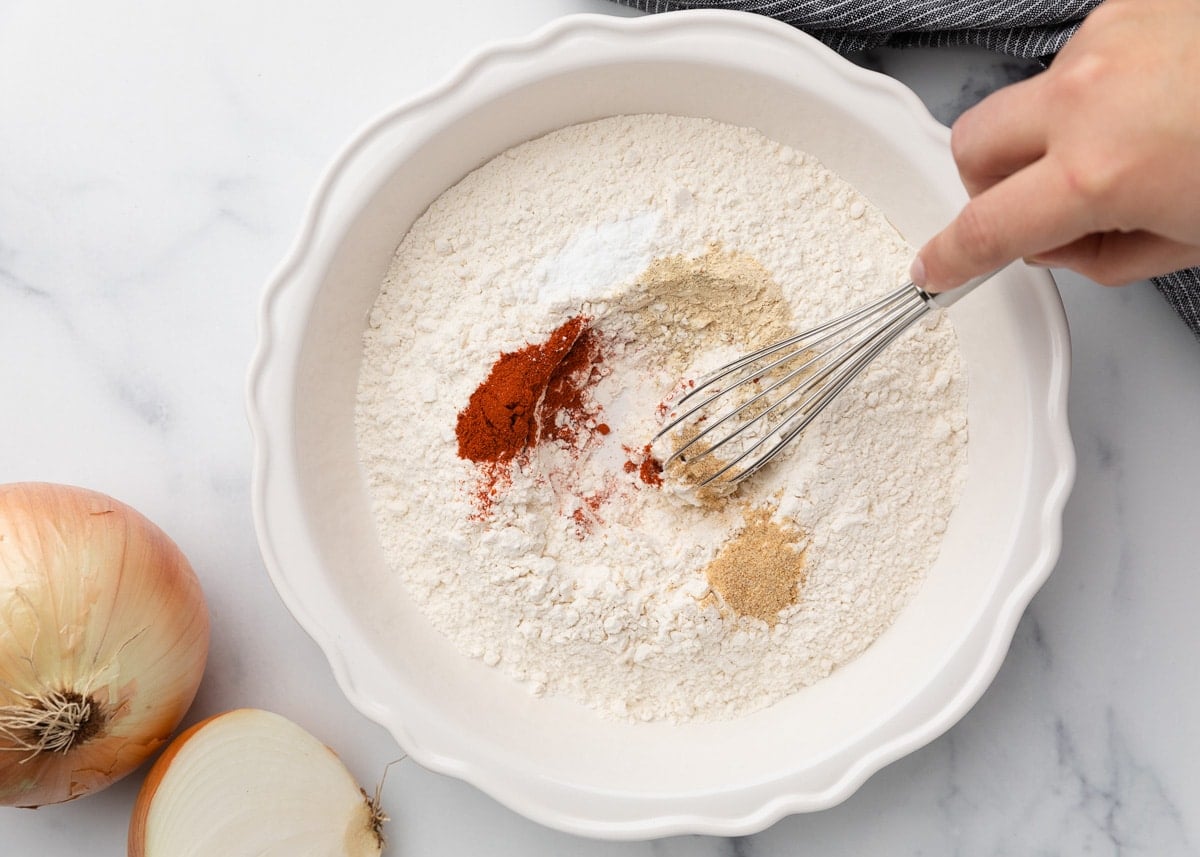
While the onions soak, mix up the seasoned all-purpose flour that you’ll use for your coating. Using a shallow dish (like a pie plate or baking pan) will give you plenty of room to toss the onions later.
To the flour, whisk in:
- Paprika, garlic powder, and ground white pepper: Paprika adds a mild, sweet flavor and a little bit of color. (I use sweet paprika, but you can also use smoked paprika for a subtle smoky twist.)
- Seasoned salt: I like Lawry’s for its blend of garlic, paprika, and celery salt, but you can use kosher salt and increase the garlic powder slightly for a more mildly flavored crispy onion string.
- Baking powder: Helps the coating puff just a little during frying, for a lighter texture.
When the onions are drained, work with a small handful at a time to ensure even coating. Add the onions to the seasoned flour and toss gently to coat.
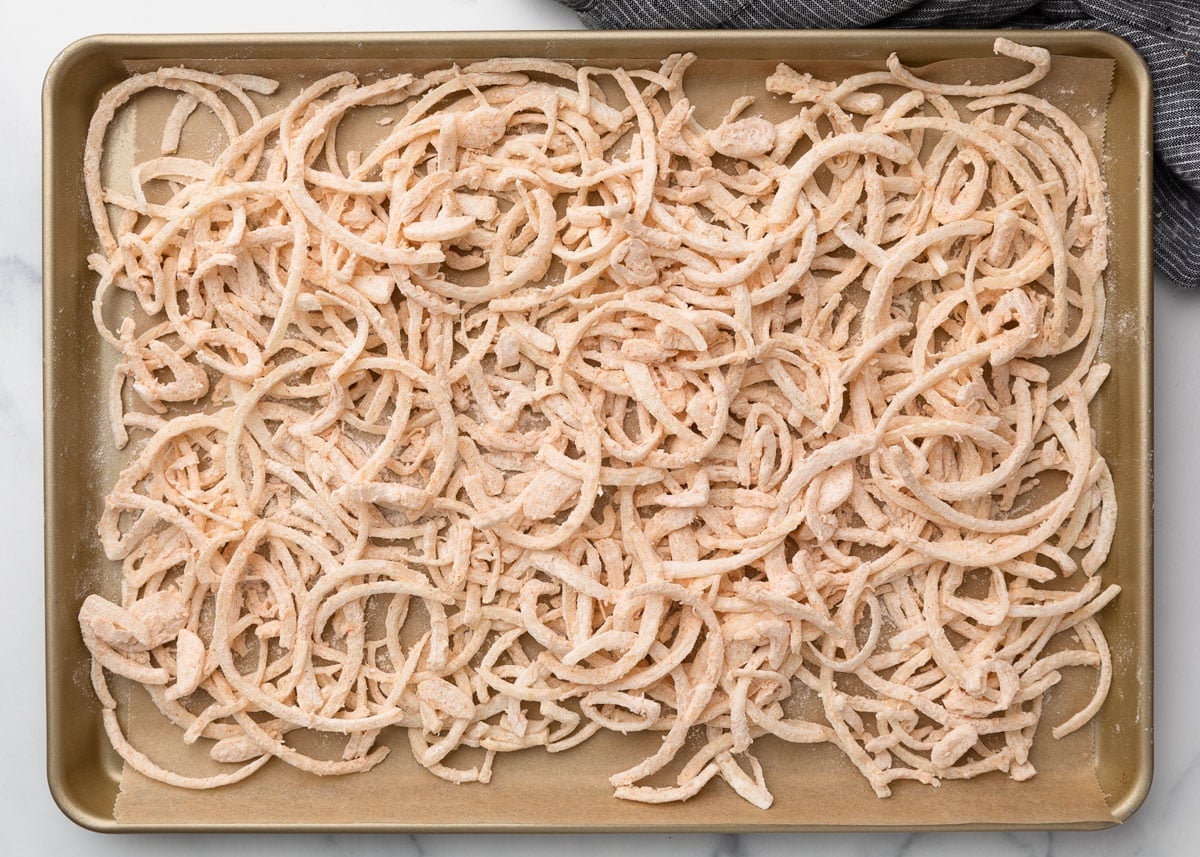
Using a spider tool or slotted spoon, lift the coated onions out of the flour, shaking off excess. Spread them out on a parchment-lined baking sheet instead of piling them in a bowl—this keeps the coating dry and prevents sticking.

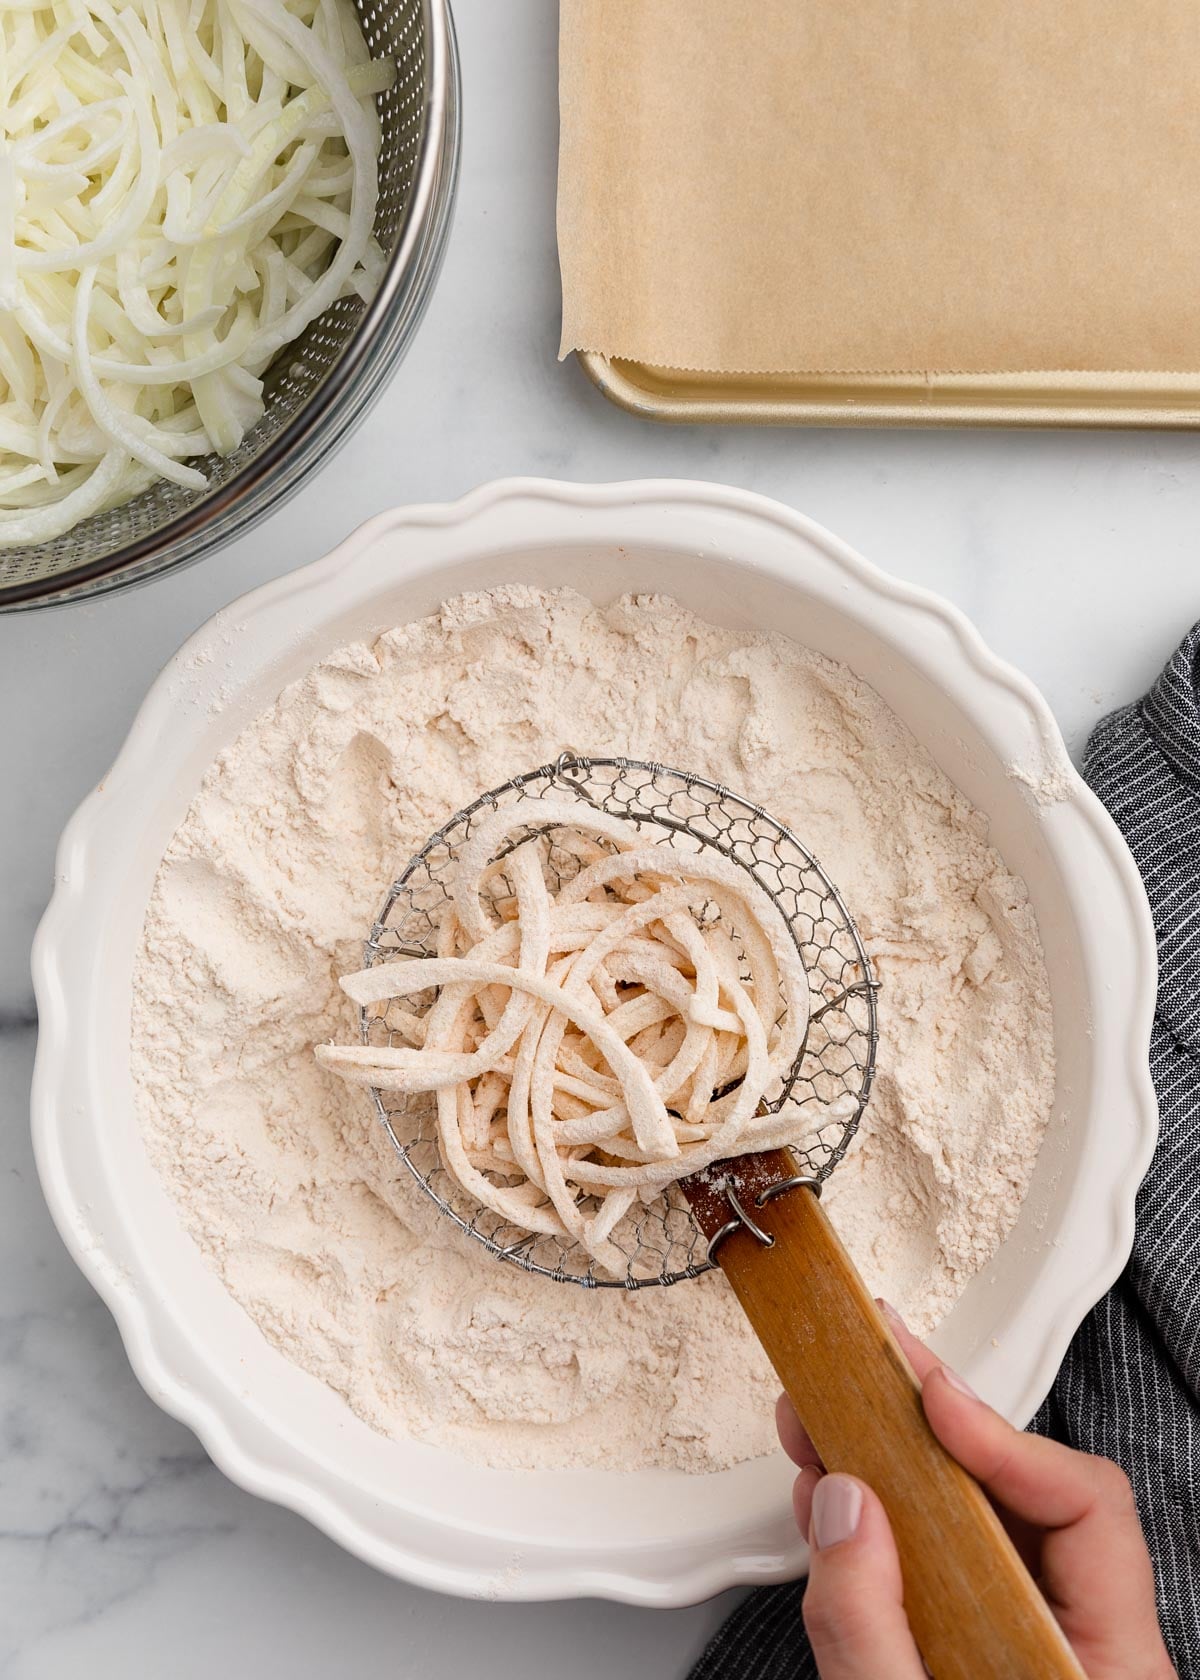
Continue coating in small batches to prevent the flour from clumping and to ensure each piece is lightly and evenly covered.
You’ll have seasoned flour left over, but using less when you’re flouring the onions would result in a gluey coating. Don’t throw the extra flour away—keep it on the side to quickly re-toss the onions if they begin to look damp as you work through the batches.
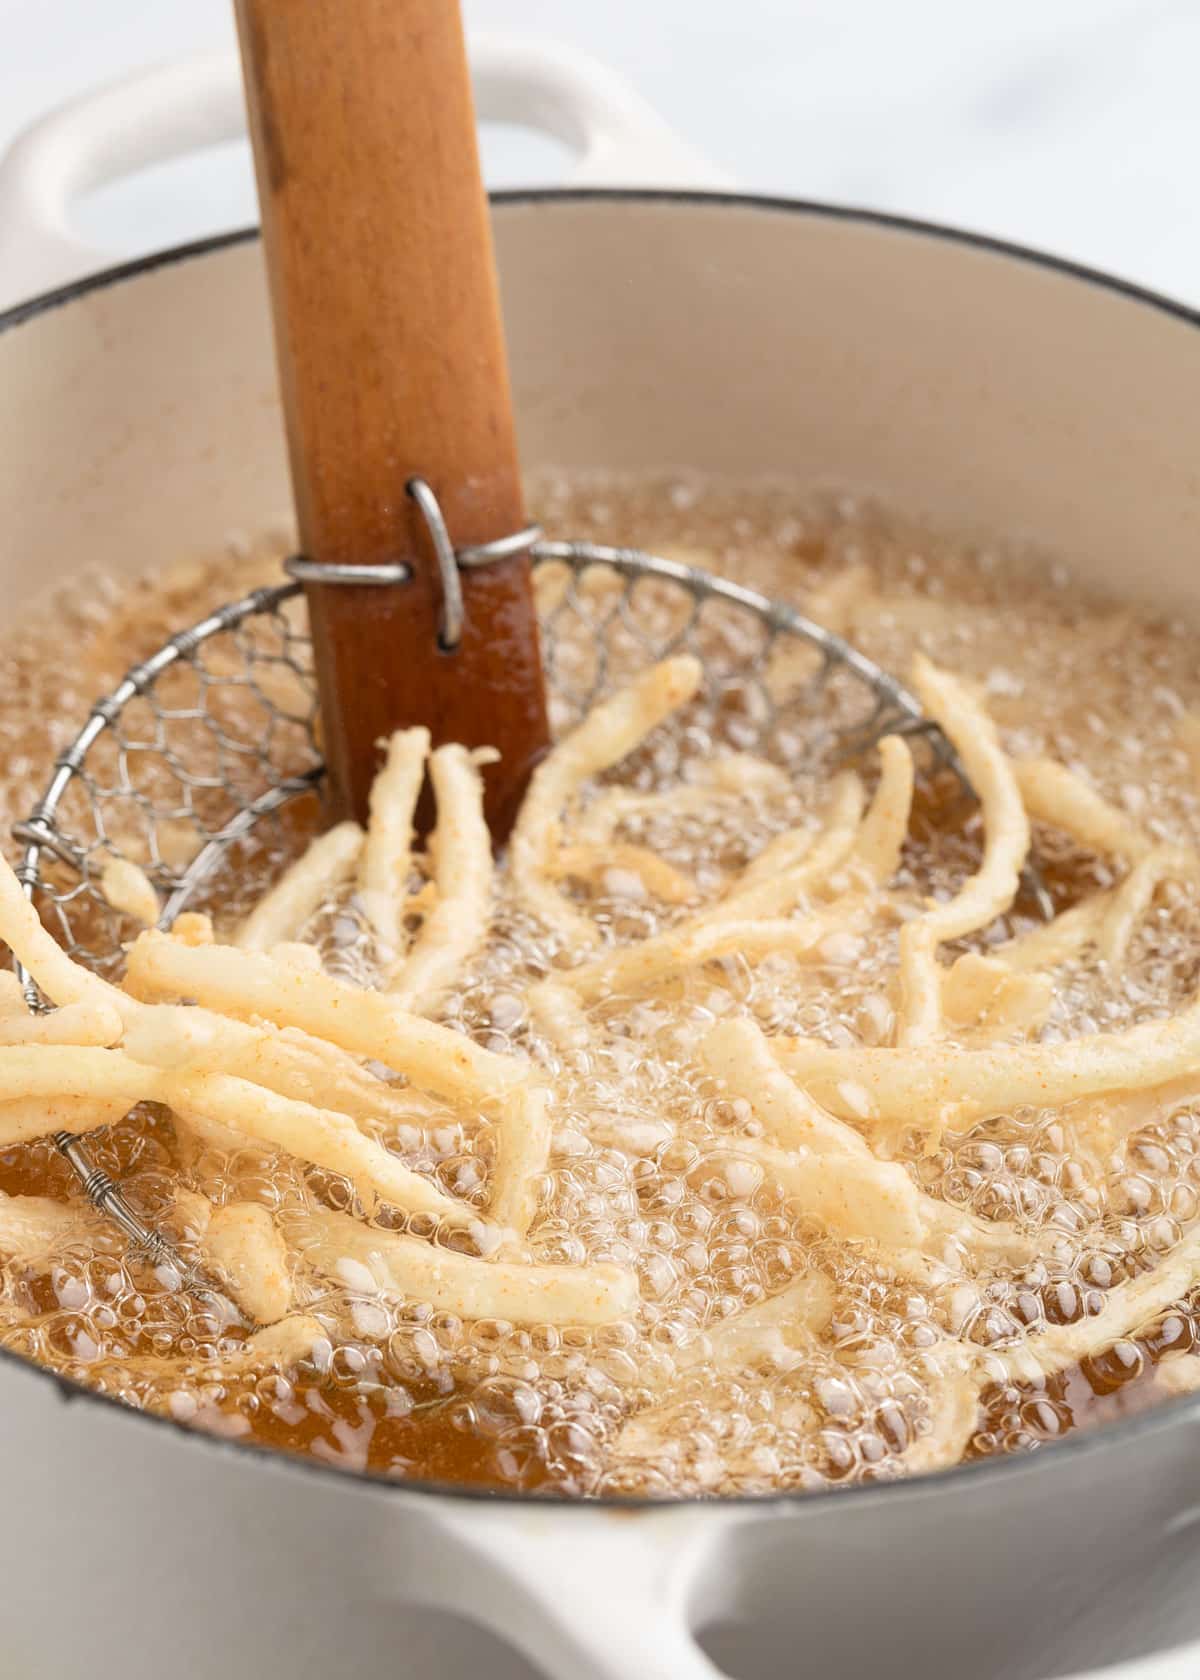
Step 3: Fry the Onions
Pour about 2 inches of frying oil (such as vegetable or canola) into a deep, heavy-bottomed pot or Dutch oven and heat it to 375°F. Use a deep-fry thermometer to keep an eye on the temperature.
Working in small batches (a handful or two at a time), carefully add the coated onions to the hot oil with a spider or slotted spoon. Gently stir as they cook to keep them separate. Fry until the onions are golden brown and crisp, about 3–5 minutes per batch.
Don’t overcrowd the pot—too many onions at once will drop the oil temperature and cause greasy, soggy results.
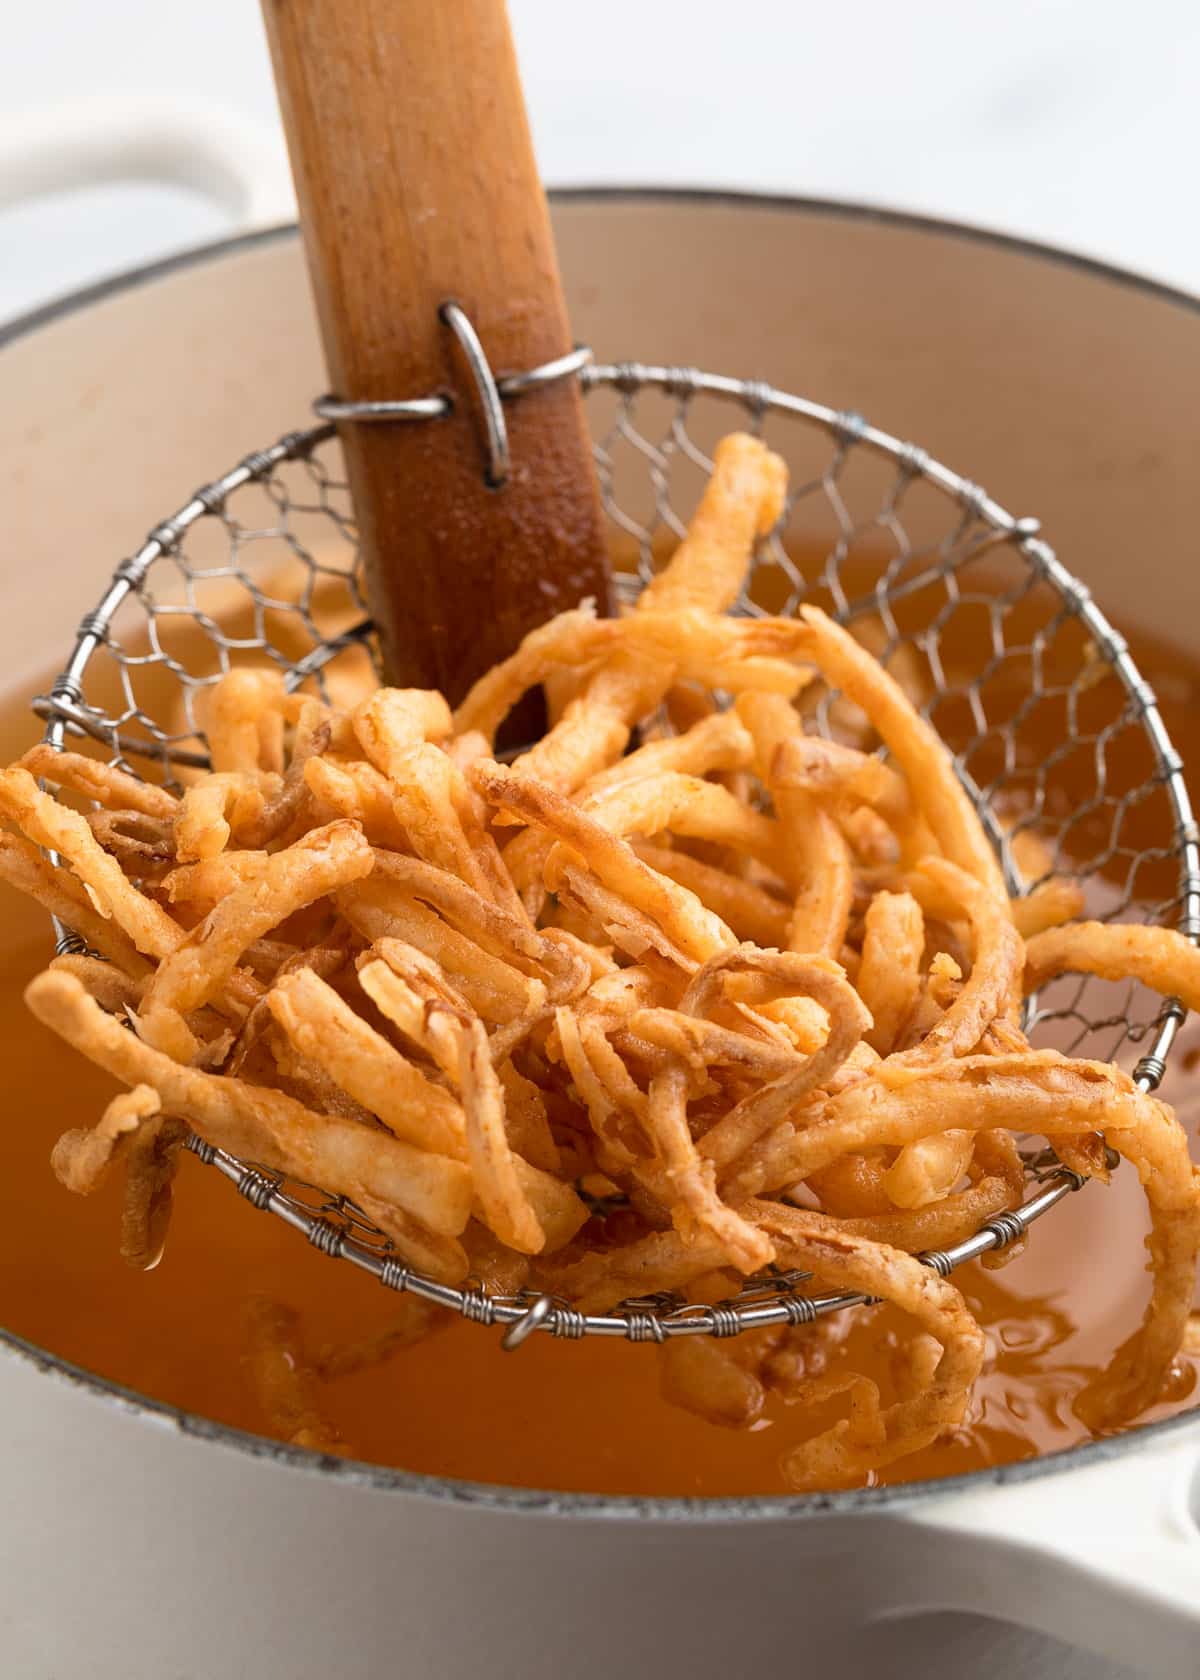
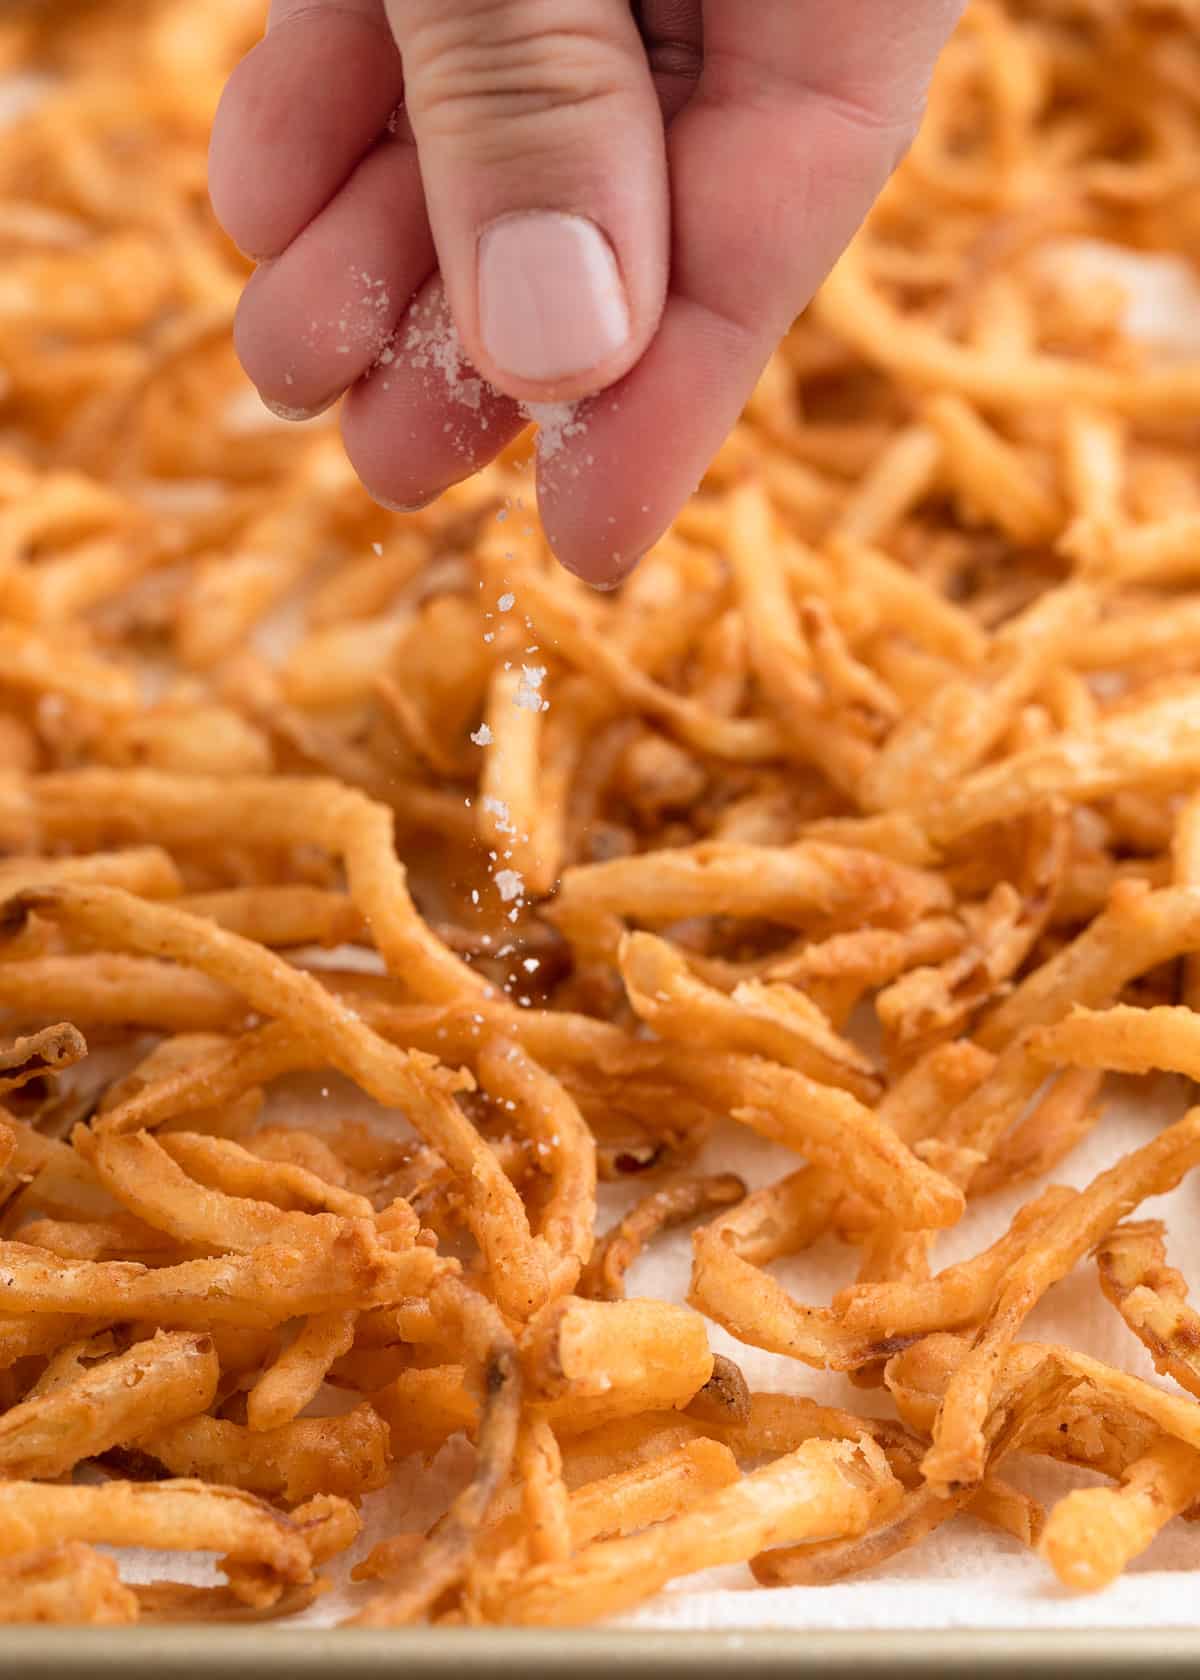
When the onions are done, lift them out with the spider strainer and transfer them to a paper towel–lined tray to drain. Immediately sprinkle with kosher or fine sea salt while they’re still hot.
Between batches, skim out any stray flour bits floating on top of the oil with the spider strainer, and let the temperature return to 375°F before adding the next batch.
If the un-fried onions begin to look wet as you work, quickly re-toss them in some of the reserved seasoned flour, shaking off any excess before frying.
After draining, spread the onions on wire racks to cool completely. This lets air circulate underneath to prevent steam buildup, which can soften them.
Storage and Reheating
When the French Fried Onions are completely cooled, transfer them to an airtight container for storage. Their texture is best when they’re fresh, but you can keep them at room temperature for 2 to 3 days.
To re-crisp, spread them on a baking sheet and bake at 375°F for 5–8 minutes, until hot and crunchy. You can also add them at room temperature to the top of baked dishes (like Green Bean Casserole) during the last 5 minutes of cooking.
Don’t refrigerate these—the coating will become gummy.
Serving Ideas
The most classic use for French Fried Onions is topping casseroles, like Homemade Green Bean Casserole at Thanksgiving. They also add a great crunch to comfort food favorites, like tuna noodle casserole or chicken casseroles.
You can also sprinkle them over cheesy baked mashed potatoes for a crispy finish.
Outside of casseroles, use these crispy onion strings as salad toppers; stack them high on burgers or chicken sandwiches (they’re great with smoky cheddar and BBQ sauce); or add them to a pulled pork sandwich for extra texture and flavor.
Want to snack on them? Serve a bowl of French Fried Onions warm with Honey Mustard Sauce, ranch dressing, or Comeback Sauce for easy dipping.
French Fried Onions (Crispy Onion Strings)
Ingredients
- 1 pound large sweet or yellow onions (see note)
- 2 cups buttermilk , preferably whole
- 2 cups all-purpose flour
- 1 teaspoon sweet paprika
- 1 teaspoon Lawry's seasoned salt or Diamond Crystal kosher salt , plus extra kosher salt for sprinkling after frying
- ½ teaspoon baking powder
- ¼ to ½ teaspoon garlic powder (see note)
- ¼ teaspoon ground white pepper
- 4-5 cups high heat, neutral oil (such as vegetable oil) , for frying
Instructions
- Halve the onion through the root, peel it, and slice crosswise into very thin half-moons (about 1/16–⅛ inch thick). A mandoline works well for cutting thin, even slices. Separate the pieces into individual strands.
- Place the sliced onions in a medium bowl and pour the buttermilk over them. Stir to coat and let stand for 30 minutes, stirring once or twice. Drain very well in a colander so excess liquid doesn’t weigh down the coating.
- In a wide, shallow dish, whisk together the flour, paprika, seasoned salt (or kosher salt), baking powder, garlic powder, and white pepper.
- Working with a small handful at a time, coat the drained onions in the seasoned flour. Use a spider or slotted spoon to lift them out, shaking off extra flour, and spread the coated onions on a parchment-lined sheet so they don’t clump.Do not discard any remaining seasoned flour—you’ll use it to re-toss onions that become damp while waiting to be fried.
- Heat about 2 inches of oil in a deep, heavy pot to 375°F. Fry the onions in batches, stirring gently with a spider strainer or slotted spoon to keep them separate, until golden and crisp, 3–5 minutes. For the crispiest onions, avoid crowding the pot to keep the oil temperature from dropping too much.
- Transfer the fried onions to a paper towel–lined baking sheet. Sprinkle with kosher or fine sea salt while hot.
- Continue with the remaining onions, skimming out stray flour bits from the surface of the oil with your spider strainer between batches so they don’t burn.If the un-fried onions begin to stick together or look too wet after sitting, quickly re-toss them in a little of the reserved seasoned flour before frying.
- Let the onions cool completely on wire racks. Store in an airtight container at room temperature for 2–3 days. To refresh fried onions for snacking or for dishes that aren’t baked, spread them on a baking sheet and re-crisp in a 375°F oven for 5–8 minutes. For casseroles, add stored fried onions during the last 5 minutes of baking so they crisp without burning.
Notes
- Use ½ teaspoon garlic powder if seasoning the flour with kosher salt.
- Use ¼ teaspoon garlic powder if using Lawry’s seasoned salt.
Nutrition Estimate
Nutrition information is automatically calculated, so should only be used as an approximation.
Please note that our recipes have been developed using the US Customary measurement system and have not been tested for high altitude/elevation cooking and baking.